Create Clay Hats and Crowns!

Create  Clay Hats and Crowns!

Wednesday, October 28, 2009

New Set of three paperclay dolls!


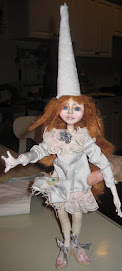
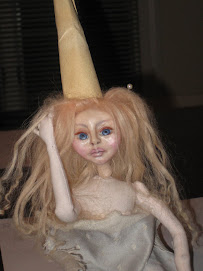
Today I strung the three new paperclay doll bodies.... theirHead with busts, arms and legs were sculpted from paperclay over styrofoam and foil and painted with acrylics. I sewed and stuffed their fabric bodies and attached arms and legs. I drilled holes in the shoulders and strung the arms through using heavy button thread. Then I glue gunned the soft body into the paper clay bust, after i removed the styrofoam and foil. I still had an ounce of energy...so I wigged them using dyed mohair. They were supposed to be halloween dolls..but i feel like its too late...i dont know...maybe they will be a different theme..I'll see how it flows!

Sunday, October 18, 2009

Halloween Dolls 2009


So I'm looking at my past two years of halloween dolls...and I'm trying to do something different. Here are my 2007 and 2008 dolls...and the START (kind of late!) of the 2009 dolls I have also made all of their arms and legs, I'll sew their bodies tomorrow!......
I only have an idea for one doll...hoping the other two will just floW!

Friday, October 16, 2009

Last of this Tiny paperclay doll series.......


These are the last 3 paperclay dolls of this series, "Children and their dolls".


The Little girl in the leopard outfit is a bit shy because she's kind of Odd looking, so she has a "Fox" mask. The Mask was formed from super sculpey and then "FLOCKED" with mohair that was dyed brown...i tinted the darker areas with watered acrylics.


The last two dolls are birthday twins with their mini crying babies and gingerbread cookies!

Sunday, October 11, 2009

ART IS in CT!


WOW!!!!! I went to ART IS in Connecticut for one day...oh, I think i'm going for all 5 days next year! It was really cool and my good doll friend, Minnie Curry from the Manhattan doll club is one of those "mover and shaker" people...so she introduced me to so many new people. It was just people taking all type of mixed media classes all over the hotel, eating, inspiring each other...and of course a cool "market place"!!!


I took the Lillian Alberti paperclay class. Lillian is a "whimsical artist" and her work was so inspiring! She brought so many Nursery Rhymes to life in a Wimsical Way....

Monday, October 5, 2009

Tiny Paperclay dolls ...Cupcakes and "Weirdo Princess"!


This is another tiny paperclay doll that is now complete. I thought her face was soft and sweet like a cupcake...so there you go!
Her Dress is sewn from vintage "flea market" lace..and the detail on her shirt is just watered down acrylic paints painted with a fine brush to bring the Flower details of the lace out....i coated this with a thick medium that dried clear. She has a tiny polymer "candy baby" with her...and she also has some of those same polymer candies on her outfit..they are coated with "triple thick"...my "new favorite glossy topping!" , and glass glitter.
Her cupcake hat is make out of polymer and Golden's "stucco" medium. I made the base, the cake part out of hollowed polymer, then added a little tissue paper coated with polymer medium. After that was baked, I "swirled" stucco medium, which was lighty and fluffy (a tiny bit gritty), just liked frosting! I painted, coated it with polymer medium and sprinkled with glass glitter.


Weirdo Princess's cat is fabric, coated with some paperclay to build up her face. She was sanded...painted and sprayed with "duncan porcelain" spray. It gave her a muted ceramic like look which I really liked because I had painted her too bright and glossed her...she looked, well, "not good"! Then I just took a chance and sprayed her with this "Porcelain look " spray...and it was exactly what I was looking for..a muted vintage look. Her collar is a string of vintage diamonds.

Sunday, September 27, 2009

Vintage Bebe completed!!


OK!! Vintage Bebe is completed.... the only thing i need to do is make an old raggedy teddy bear for her one "cyclops" hand...it will hide the hand and give her a little more charachter!


This baby is a little sad...it is kind of what i was going for...next one i will try an actual "pout" I knew i didnt have time in class to play with that...


Also...she has a bit of a "startled" look..which could have been avoided if i brout her eyelids a little more over her eyes. That tiny bit of white showing makes all the difference in the world.... i like large eyes and i was trying to open them more..a larger eye would have been the better option...haha!!!


Her clothes are all sewn out of Very old vintage pieces (shirts, collars, decorative mats) that i have collected from flea markets and antique shops. I had to be careful making her shoes...the silk material was so old...if you pulled it..it just shred into a handful of fibers, so i was able to save the fabric by brushing polymer medium on the back , making it sturdy and easier to form the shoe....The soles are polymer clay.


Saturday, September 26, 2009

Jack Johnston Class...creating a Polymer Premie baby

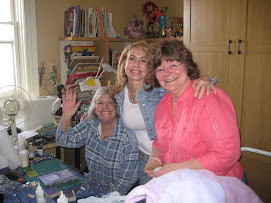
, Heather, Heidi,Tery, Sylvia and Myself with our "babies!


My "Poor Child"!


Working with Jared!


Tery's "Barry"


Joyce's
"chubby cheek" baby


Minnie acting like a "goof ball"

Tery, Heidi and Heather...Workin' it!!!


Heidi and Sylvia doing the dishes!


So ....our Jack Johnson class on creating a polymer premie baby has come and gone...after a Year of waiting! It was so far, my favorite class! We were a "family" of friends learning for 3 days (and nights!!!) and just being "creative together. Jared Johnston actually taught the class...he is the "Baby Lover" and he gave each one of us a lot of time teaching valuable techniques. He pushed us past the "comfort" zone...my comfort zone anyway....but i gained a lot from that.


For me to make a doll in 3 days is like REDICULOUS!!! but i did it! ....I see it's flaws (ugh!...they are magnified!!!) , but these are the things that i'll practice...So actually the flaws are the best part of this doll!! , they will be the thing that will help me to eventually be a better sculptor!


I am working on my dolls outfit and hair ...almost completed...thats another shocker in itself...because I dont finish a doll from a class. I feel like I learned on it and its just too "rough" to complete...I'd rather start fresh from scratch ... but this class i'm buzzing from.... I just have to complete this one!!!


Check out the weekend.....It was Fantastic!

Wednesday, September 9, 2009

Bee Girl...moving along on the fairies and their dolls


Two Fairies and their dolls are complete....bee girl and and her "LIL Sting" doll...and Girl fairy and her mermaid doll. The little "sting" doll is very tiny...but i think she is the right scale to be bee girls dolly. The mermaid is a bit too large..to be this little girls doll...but i'm tired...she will do!!! The rest of the fairies dolls will be made as tiny as the "sting" baby...i made a mold of her head...so i will be able to produce babies a little faster now! I did one other princess doll the same scale as the mermaid... she will also stay!
These two small dolls are named "Little KIMEE" dolls in honor of my sister Kim, who has a special place in her heart for tiny dolls and fairies.....

Tuesday, September 1, 2009

Summer is over!

My Paper Clay/Fabric Children...

A Cat doll created by Stacey and given to me!


Stacey Sewing with her "Shoe" Creation !

Deb's "Brothal" Shoe


I feel like i'm regaining conciousness!!! I feel my blood starting to circulate...Taylor is back to school tomorrow morning!!! PARTY!!! haha!! yeah right!

Anyway....back to business...i'll go back to where I left off...the Stacey Clark class! It was a great "learning" class...Stacey is a truley "creative Being"... and I loved being in her creative energy ... Here are some pictures of the OLD LADY in the SHOE class...


Monday, June 29, 2009

My Prepared dolls for class


So I was able to finish 7 small dolls. Their Head/ Bodices, legs and arms are made out of paper clay...they have fabric bodies. I copied the idea of the doll structure from a tiny old vintage doll that I found Naked at a very old PA flea market! I was able to really smooth their faces by sanding.... I used Hanni Sarris fairy paint...and Duncan matte spray..and they really look kind of vintage!!!

Friday, June 12, 2009

New fairy...and Preparation for class!


ok...back in action...I decided to just be a "starving artist" this summer! I am closing my ebay store next week ...until summer ends...I'll just sell a little mohair when i feel like it!


I already started on a new Fairy ...She ends up having a meek ...gentle disposition, so now i have to decide what she will wear and what she will be doing. Maybe after I "make her face up"..the personality may change...I dont see that happening though.


But now I had to put her aside, to prepare for our upcoming class in two weeks. We will be having Stacey Clark, an artist from Pennsylvania that did a "MAGICAL" exhibit in a PA museum. We were all so fascinated by the techniques she used to paint and texturize her fabric and doll faces and bodies...also her free motion combined with mediums to create beautiful texture on the dolls clothes, accessories and lifelike animals. We asked her if she would come teach...and she was thrilled!

We will be doing THE OLD LADY IN THE SHOE...you know the one with all of the kids?! (UGH!) haha..So I have started my prep work.....I am doing my childrens heads/upper bodice in paper clay...so i get to work in clay, but paint them like they were fabric! Paperclay painted dolls with varnish on them..remind me of "OLDEN DAY" dolls...so that is the look i'm going for..shiny faces!!!


I made 3 polymer heads, and then made rubber molds. I used the molds to create paper clay heads. The paperclay comes out of the mold a very flat...so you have to redefine everything...but its still waaayyyy!! faster than going from scratch...I created 7 new paperclay heads in 2 days...that is BIG for me...i'm kind of slow at sculpting. I then made little upper torsos out of styrofoam and foil. Then i covered them with paperclay...attaching the heads...Check it out.... (Iam learning some of these paperclay techniques from a book i sent for : Dollmaking with Papier mache and paper clay by Doris Rockwell Gotilly. The book is about 10 years old, but it has amazing photos and techniques...i love this book!)


I also found an old pair of black boots at the flea market for 5 bucks! for my shoe..i can alter it to make it look better...BUT I also foumd these very cool OLD she lasts..hmmm. i was thinking...maybe i can cover one with paper mache and make my own shoe!!!! ok..i may not REALLY have time todo that..but it is a very Cool idea!!!

Thursday, May 14, 2009

Neptune Doll meeting


Yes..its horrible that i have not been in here posting...so busy! So here is the Neptune meeting that I went to a couple of weeks ago!!! The meeting was fantastic...everyone had something to show and tell about!!! Janice even brought her beautiful daughter...who ended up "adopting" stephanies "lion " doll made from Mary Louises pattern!!

I was invited by mary louise...a fellow Saggitarius doll maker, who was teaching her realistic little "cat" dolls! I flipped when I saw them, and right away, Mary told me that I could join in the lesson!!! See the pictures of mary with her tiny "cats"... (I LOVED them so much...she gave me the white one!!!! WOW )

NY wow

NY wow
dIANE kEELER CLASS

Diane Keeler Class

Diane Keeler Class
Diane Teaching

Diane Keeler class

Diane Keeler class
Class Picture

Sculpting a Childs face

Sculpting a Childs face
My face ..Day 2 ..ready for EARS!

Working on a new face now!!!

Working on a new face now!!!
Completed face and breastplate

Attached head to breastplate

Attached head to breastplate
The clay is very dirty..the cleanest i can get it!

After Face Make up

After Face Make up
WOW...it gives a translucent glow...hid the dirt!

Removable wig...not styled or cut yet

Removable wig...not styled or cut yet
Goat mohair that was dyed and combed

Now she's styled!

Now she's styled!
But it is a wig...it will be glued when i'm ready!!!

Painted Face...still needs brows and lashes!

Painted Face...still needs brows and lashes!
She will be sealed with Duncan flat mat as soon as it comes in the mail!

Cloth Pixie body fit under breast plate...

Cloth Pixie body fit under breast plate...
After drawing and sewing a million body parts....

Girly girl "21" charms

Girly girl "21" charms
Angelica's 21st birthday charms

Devon with his creation

Devon with his creation
Devon and his monkey boy

Devons Doll that he made from a pattern

Devons Doll that he made from a pattern
Monkey Boy

another charm group

another charm group
Debbies Charm

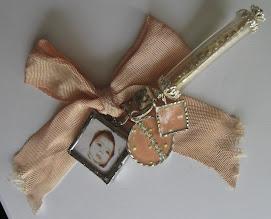
Leapord tube charm

Leapord  tube charm
The diamond shape is a soldered glass bead.

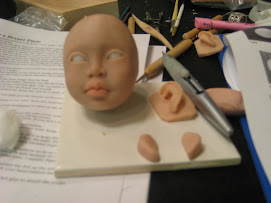
Wax medium melted over polymer clay face....

Wax medium melted over polymer clay face....
She's getting there..i think this hair suits her better..she needs eyelashes and ears

Odd Vintage bug- like Fairy

Odd Vintage bug- like Fairy
Just the idea

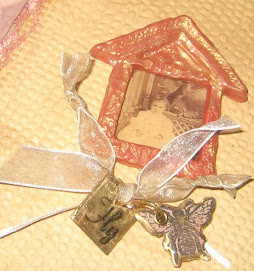
Clay Window glazed with Utee

Clay Window glazed with Utee
Stamped Utee glazed "Charms"

Clay Charms

Clay Charms
Making a mold from a charm to make more charms!

Charming

Charming
Clear tubing and stamped Utee

Charming!!! ....REALLY!!!

Charming!!! ....REALLY!!!
Soldered Vintage photos

Charming!!! ....REALLY!!!

Charming!!! ....REALLY!!!
Soldered Charms

Journal Day with Tery and Stephanie

Journal Day with Tery and Stephanie
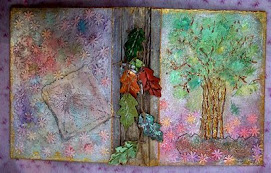
Creating an Art Journal

Stephanies journal

Stephanies journal
of course..completed first!!

New Art Journal

New Art Journal
Journal made from SCRATCH!!!

Art journal EMBELLISHMENTS

Art journal EMBELLISHMENTS
Clay, Stamps, Utee

Inside cover

Inside cover
Material and free motion stiching

Celeste

Celeste

Celeste up close

Celeste up close
Celestes shirt is made from gessoed and tinted lace with free motion embroidery

EVA

EVA
She is with her new mom Evelyn