Create Clay Hats and Crowns!

Create  Clay Hats and Crowns!

Wednesday, January 27, 2010

Wings ...Day 2!


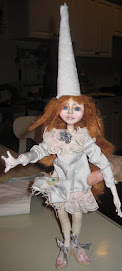
So I "Worked" on wings again today.  I went in many different directions...and failed a couple of times...but now I feel like I'm getting  "Some where else"!!!!


The rust thing worked so cool...In the morning...there were small rust spots on the wire that I treated last night...but I remembered reading ..Apply in thin coats...to get a heavier effect.  So I did one more coat...and I LOVE  what it looks like.  I now have a "Rusty old pair of wings" from a fairy that has been lost out in the elements for years and years!  I found this crinkled mat shimmer  type paper that was for making bows...cheap stuff... I glued it to the rusty frames and hit it with the heat gun...maybe because it was cheap...It  tightened smoothed in an instant..leaving those tiny crinkles all around the edges next to the wing frame, but remaining So Crystal Clear everywhere else! 

 I dont know if I really captured it in the pictures, but the wings look like rusty old window frames...with  that old looking glass that has "Frost" on the edges because its so "fridgid" out!  These are my favorite wings...because I keep seeing these old windows to some old forgotten place! 


Then I did a "shimmer" pair that I am pretty happy with...The frames were wired around a wing design that i took from a wing art cd printed on a clear plastic sheet (its 4 seperate wings wired together.... I then used Ranger Gold alcohol ink mixative to color the wire...It gives it a more Matte metallic look.  I used the sheets of angelina glued to the frame and "zapped" with heat!  Then metal findings were also colored with the gold after being attached.  I coated the wing with Triple thick closs coating.  After drying...I added gems...Actually its still not dry...I just had to finish them! hahah! 

Tuesday, January 26, 2010

Workin' on Wings!!!


OK...so I have a ton of information on wings...But when i started to work on them...well...NOTHING was working!  I began this wing thing frustrated...BUT then I started to flow!!   I  saw a picture of these wings done in a cool book called Enchanted Adornments by Cynthia Thornton. The Wings were shaped with wire...then  tissue paper was glued on the back..and then they were dipped in resin.  So I startted working on them...I didnt like the tissue paper idea...so i used angelina in a sheet...i cut around the edges after gluing...then hit it with the heat gun...it tightend the sheet around the wire, putting a few "pretty " holes in the wing and , pearlized it!  I took my wings a little farther and added some ornamental metal findings...I used two part resin , and then finished it off with vintage diamonds.  These wings are for a tiny doll..now I will base her clothing around the wings.


I did the second pair...wiring them also...but instead of the resin, i used triple thick glaze....


and for the third pair...I did not wire veins...I dipped the wing with findings glued in place,  in  melted Utee ...then after hardening, I added one more set of findings and diamonds .


The last pair is in progress...and this is the one i'm most excited about!  I read in the Jan/feb issue of somerset studio, an artist that uses a metal paint...and then a solution to rust it, and she uses it on most all surfaces...i'm thinking of vintage worn wings and crowns...ugh!!! the possibilities!!!    I was on a mission, where do i find this stuff...i go back to the magazine...she DOESNT TELL!!!  hmm...where...then ...i'm thinking...hey wait a minute...i think i have something like that...i search my shop...where is that stuff??!   FINALLY....I find it...I got it in the city last year...and never tried it...I got iron, bronze and copper metal paints...and green, blue, and aging dark patinas!!! hahahaha   so I tested it on a bad wing and a piece of clay!!!  OMGOSH...it works...I have rust!!!  so I wired a new shape wing and painted them...dried the paint...and then put the solution on and left it for tonight to "RUST"!!!   I think these are going to be Very Cool wings....


Monday, January 18, 2010

Lillian Alberti Paperclay Doll Armature Class

Wow!!!  This weekend I hosted an armature class by Lillian Alberti at my house !  It was a fantastic weekend,  we learned so many valuable techniques to creating a good strong armature. And we learned tips on celluclay and its ability to build up the armature, then finally covering it with a thin layer of paperclay.


Everyone stayed  for the weekend... we ate good food, inspired each other.....and worked late into friday and saturday night!

This is a picture of Lillians mouse dolls that she just completed!  I love these dolls, they really are perfection...she made the little cakes too!

Also, Lillian with my "Moon",  he is a "naked" sphynx...some day I will make a little doll with "moon's" head!


Lillian was a great teacher, she was patient and just so inspiring!  I really appreciate her art and her ability to share her knowledge........


Monday, January 11, 2010

Lullabye League Body Parts Completed Today!


Today I got some time in to sand and paint the arms and legs of these tiny dolls.  I painted them with Hannie Sarris paints...this gives such a beautiful finish....I do love the easy coverage this paint gives.  I then  sprayed the parts with Duncan super matte spray.  It goes on shiny...but dries to a beautiful soft matte finish.


 I sewed up two tiny bodies using  a very easy pattern I created to fit perfectly into the paperclay upper bodice that I sculpt for these dolls...I Hollow the center of the bodice out, leaving a short armature wire that goes into a small opening at the top of the fabric body. 

I Hot glue the two parts snugly together. 

Thursday, January 7, 2010

Heads and bodices complete !


Today I worked on the other two "Lullabye League " dolls.....I sanded...painted and Wigged them. I gave them a soft shimmery look by dusting them with this pretty pink Channel face powder that I had...(Even after i sprayed them with super matte by Duncan) I think they will fit this group..They are gazing...which is "A Good Thing"...I needed them to be a little more "graceful"  than the last set of dolls....I feel like I accomplished that...and hopefully they will come "Alive " when I dress and Embellish them!

In This second picture I have competed their wigs...the first picture, I wet the mohair down and back...Training it a bit...then with some spraygel ...after it dried...I  brought it forward in nice waves!

NY wow

NY wow
dIANE kEELER CLASS

Diane Keeler Class

Diane Keeler Class
Diane Teaching

Diane Keeler class

Diane Keeler class
Class Picture

Sculpting a Childs face

Sculpting a Childs face
My face ..Day 2 ..ready for EARS!

Working on a new face now!!!

Working on a new face now!!!
Completed face and breastplate

Attached head to breastplate

Attached head to breastplate
The clay is very dirty..the cleanest i can get it!

After Face Make up

After Face Make up
WOW...it gives a translucent glow...hid the dirt!

Removable wig...not styled or cut yet

Removable wig...not styled or cut yet
Goat mohair that was dyed and combed

Now she's styled!

Now she's styled!
But it is a wig...it will be glued when i'm ready!!!

Painted Face...still needs brows and lashes!

Painted Face...still needs brows and lashes!
She will be sealed with Duncan flat mat as soon as it comes in the mail!

Cloth Pixie body fit under breast plate...

Cloth Pixie body fit under breast plate...
After drawing and sewing a million body parts....

Girly girl "21" charms

Girly girl "21" charms
Angelica's 21st birthday charms

Devon with his creation

Devon with his creation
Devon and his monkey boy

Devons Doll that he made from a pattern

Devons Doll that he made from a pattern
Monkey Boy

another charm group

another charm group
Debbies Charm

Leapord tube charm

Leapord  tube charm
The diamond shape is a soldered glass bead.

Wax medium melted over polymer clay face....

Wax medium melted over polymer clay face....
She's getting there..i think this hair suits her better..she needs eyelashes and ears

Odd Vintage bug- like Fairy

Odd Vintage bug- like Fairy
Just the idea

Clay Window glazed with Utee

Clay Window glazed with Utee
Stamped Utee glazed "Charms"

Clay Charms

Clay Charms
Making a mold from a charm to make more charms!

Charming

Charming
Clear tubing and stamped Utee

Charming!!! ....REALLY!!!

Charming!!! ....REALLY!!!
Soldered Vintage photos

Charming!!! ....REALLY!!!

Charming!!! ....REALLY!!!
Soldered Charms

Journal Day with Tery and Stephanie

Journal Day with Tery and Stephanie
Creating an Art Journal

Stephanies journal

Stephanies journal
of course..completed first!!

New Art Journal

New Art Journal
Journal made from SCRATCH!!!

Art journal EMBELLISHMENTS

Art journal EMBELLISHMENTS
Clay, Stamps, Utee

Inside cover

Inside cover
Material and free motion stiching

Celeste

Celeste

Celeste up close

Celeste up close
Celestes shirt is made from gessoed and tinted lace with free motion embroidery

EVA

EVA
She is with her new mom Evelyn