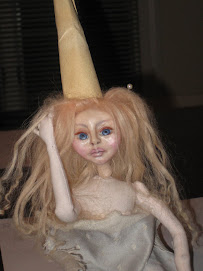
Create Clay Hats and Crowns!

Create  Clay Hats and Crowns!
Showing posts with label Art Is You East Coast Retreat. Show all posts

Thursday, January 12, 2012

New Year..New Hopes, Dreams and Dolls!


Every Dream is Worth Dreaming


Mermaid Ballet Slippers from Sof t Leather and Polymer Clay soles


Vintage Paperclay Mermaid


A "Fox Tale" .........Coming Soon!!

Sue Milos Master Molds!


Well...I guess I had to re coup from Christmas!  But I'm feeling Strong ..Energized and Excited for New Stuff to Happen!  There is a lot of New Creative Energy flowing...and I have Completed a Mermaid Doll!!! Of course Under pressure...because that is good for me!
Her tail is paper clay on a foil and wire armature that is jointed so it can bend. The design in the clay was created by pressing a stamp into the moist clay.  Paints and rub-ons were used to create depth...the it was glossed with triple thick. The joints were created with bead caps and findings.   I had to send the doll out and hopefully she will be in an Article.  I won't say anymore until it happens!!! haha
 (I hate rejection!).....


Sues "Many" Tiny Sweets!

Anyway....I went to visit my Friend Sue Milo and we both got crazy with creating tiny sweets...Finding special molds...clays...embellishments for toppings...blah blah blah...I cant wait to continue on my sweets making journey...But I Believe Sue went over the edge! haha...She made some beautiful original sweets..and she also went nuts creating her own molds....She is now the "Precision Master Mold Maker" in my book!!! Check her stuff out!

And last but not least...Is my ART IS You 2012 Class Project. She Is halfway there...The Class is written up and now She needs to Come Alive !  I know where I'm going with this....I hope she becomes who I want her to be ..sometimes these dolls are so stubborn...and refuse to cooperate...

Tuesday, September 20, 2011

Cindy Lou dolls done!!! ugh!! On to Halloween Dolls!


Suessical Hairdos!


Ready to be tagged...

Completed Candy Hat


Cleaned, brushed and Dyed Mohair

Preparing for Wigging

Finally....ugh!!!  Cindy Dolls are completed ready for their tags and bags!...Wigging is a time consuming affair for ten dolls....but I think its really the point where they receive their personalities!!!   I mainly use Goat Hair because I love its silkiness and it just seems the most realistic.  Hair has always been an Issue for me!  Four kids in our family, I was the only one that had this huge head of frizz and curls that grew out and up instead of down!  Maybe that is why  I take the time to prepare and beautify the hair ...Just a weirdo thing that is important to me!!!

I buy a whole goat fleece...actually many fleeces of different lengths and textures in a natural color after the "shearing" season.  I have to separate the matted, dirty, smelly!!!  hair into bundles..wash it many times and condition it.  I dye the bundles with regular hair color....and then condition again...and de-matt, trim  and brush ...what a job!!! But I love the results and the ability to have any color and texture hair on hand. 

When the doll is complete, I cover her with plastic wrap and carefully drill the top of her head with my little walnut hollow drill...this is a great drill because it fits in the palm of my hand ...its light and I can control it.  after drilling, I coat the raw paperclay with a tacky glue...and then I start to wig her.......

OK!!!! ON TO HALLOWEEN DOLLS!!!

Monday, March 28, 2011

"Art Is" Dr Suess Theme for 2011 Swap


Original simple polymer sculpt with 2 paperclay "Copies"


10 Heads and 20 arms!


Cindy Lou from the Grinch Movie

Brush your mold with powder, smooth the paperclay into a thick disk


Press the paperclay disk into the mold, Press in the foil "skull"


An easier start to a paperclay doll when creating a "Series" 


So it seems that I needed to just dive in and start my "Art Is" swap ornaments.  They are due in August...but I know I am a huge procrastinator, and I am trying to change! HAHA.  I put all my wire joint doll projects aside to at least start the swap...Now that I have the beginning of 10 Cindy Lou dolls from the "Grinch"......heads, and arms....I have gained momentum, I can actually breath a bit easier... 

I knew this would be a lot of work...but the deal is, you make 9 swaps (I made an extra to keep!).  When you get to Art Is and you receive your registration "packet", you also receive a package with 8 handmade ornaments (the 9th one goes to Marlene Halveron for The HoneyComb Cottage Project )  How exciting is this...to open 8 handmade gifts,  and Know that one of my pieces of art will go to a beautiful human cause!  Oh My Gosh! I cant wait..So I"m workin at it, every chance I get!

I am designing the dolls using a picture of Cindy Lou from the "Grinch Movie".    This little character inspires me to try and remember to be loving and compassionate even under "not the best circumstances"...  I sculpted one simple face from polymer, and then made a mold.  This helps me to create 10 dolls a little quicker , for this type of Project.  Now.... dont get me wrong...you cant just stick a wad of paperclay and pull it out of the mold and ...Wha lahh! you have a sculpted head!  NO...it comes out pretty flat and there is work involved...but at least you have a start, to a doll (for me...the START is the Hardest part!!! ). From there I add bits of clay, building the face up and smoothing it out.  AND Then....Its your original doll....you made the original face and mold...so there is No CHEATING involved!!! haha

Cuddling "Moon" while working on 10 faces!
For the head...after lightly dusting the mold with powder, I smooth a piece of paper clay into a disk and fit it into the head mold.  I then take a tiny foil "scull" on a piece of armature wire, and push it into the center of the mold (creating a nice solid armature), halfway down into the paperclay.  I then pull the clay with the armature out of the mold, and add some more clay to create the back and top of the head,  When I get the right shape, I start to add my details and let it dry.  I am constantly adding wet clay to the already dry face, perfecting the details.  I love the way you can take away and add to paperclay....and after sanding , smoothing and painting...no one really knows what you did, if you were in turmoil, if there is a "fix it" going on, they just see the end result!!! 

So now that the heads are completed and smoothed, the arms are created but have to be refined.....then I will create the legs and then the neck/bodices...I think they mill have a ball joint swivel head. I'll have to see how it goes!    

Lot of "refining" work, But it"s a start!


NY wow

NY wow
dIANE kEELER CLASS

Diane Keeler Class

Diane Keeler Class
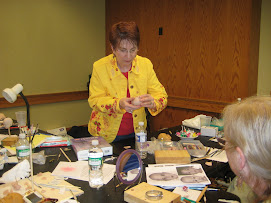
Diane Teaching

Diane Keeler class

Diane Keeler class
Class Picture

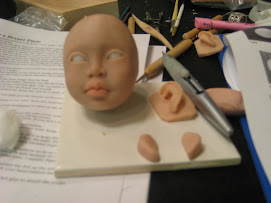
Sculpting a Childs face

Sculpting a Childs face
My face ..Day 2 ..ready for EARS!

Working on a new face now!!!

Working on a new face now!!!
Completed face and breastplate

Attached head to breastplate

Attached head to breastplate
The clay is very dirty..the cleanest i can get it!

After Face Make up

After Face Make up
WOW...it gives a translucent glow...hid the dirt!

Removable wig...not styled or cut yet

Removable wig...not styled or cut yet
Goat mohair that was dyed and combed

Now she's styled!

Now she's styled!
But it is a wig...it will be glued when i'm ready!!!

Painted Face...still needs brows and lashes!

Painted Face...still needs brows and lashes!
She will be sealed with Duncan flat mat as soon as it comes in the mail!

Cloth Pixie body fit under breast plate...

Cloth Pixie body fit under breast plate...
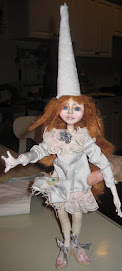
After drawing and sewing a million body parts....
Girly girl "21" charms

Girly girl "21" charms
Angelica's 21st birthday charms

Devon with his creation

Devon with his creation
Devon and his monkey boy

Devons Doll that he made from a pattern

Devons Doll that he made from a pattern
Monkey Boy

another charm group

another charm group
Debbies Charm

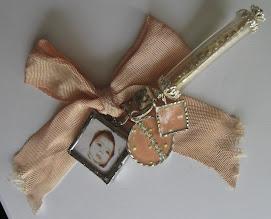
Leapord tube charm

Leapord  tube charm
The diamond shape is a soldered glass bead.

Wax medium melted over polymer clay face....

Wax medium melted over polymer clay face....
She's getting there..i think this hair suits her better..she needs eyelashes and ears

Odd Vintage bug- like Fairy

Odd Vintage bug- like Fairy
Just the idea

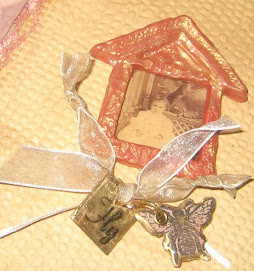
Clay Window glazed with Utee

Clay Window glazed with Utee
Stamped Utee glazed "Charms"

Clay Charms

Clay Charms
Making a mold from a charm to make more charms!

Charming

Charming
Clear tubing and stamped Utee

Charming!!! ....REALLY!!!

Charming!!! ....REALLY!!!
Soldered Vintage photos

Charming!!! ....REALLY!!!

Charming!!! ....REALLY!!!
Soldered Charms

Journal Day with Tery and Stephanie

Journal Day with Tery and Stephanie
Creating an Art Journal

Stephanies journal

Stephanies journal
of course..completed first!!

New Art Journal

New Art Journal
Journal made from SCRATCH!!!

Art journal EMBELLISHMENTS

Art journal EMBELLISHMENTS
Clay, Stamps, Utee

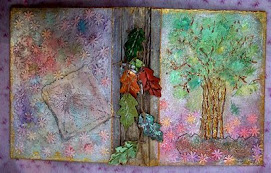
Inside cover

Inside cover
Material and free motion stiching

Celeste

Celeste

Celeste up close

Celeste up close
Celestes shirt is made from gessoed and tinted lace with free motion embroidery

EVA

EVA
She is with her new mom Evelyn