Create Clay Hats and Crowns!

Create  Clay Hats and Crowns!
Showing posts with label miniature polymer chocolates. Show all posts

Monday, November 21, 2011

So many new faces in my head.....


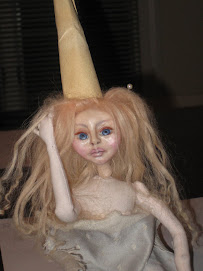
Almost ready for her face!
 

She is getting sanded and strung! She'll be painted with watercolors instead of acrylics


Choosing Colors

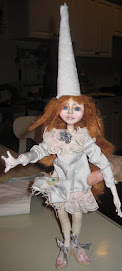
Ready for wigging..I think Red hair!


What will she be?

New Faces in  "first stage"  of refinement 

I just cant pinpoint a tail color for her....maybe if I wig her first..hmmm

  
So its the end of November...so many dolls to finish...by Christmas!  But new faces keep popping up in my head...and I have to keep stopping what I'm trying to complete...to just "Quickly " sculpt that face that I keep seeing....ugh....feeling crazy with this energy!  Does that ever happen to you?  I bet that it does...but I think sometimes we stop it from coming by trying to Follow THE RULES!!!!...  November and December  are always powerful months for me....I guess for most people too...Thanksgiving and Christmas.  This time is "Magical"..... sometimes overwhelming...but its always"Exciting"....  and Dec is also my Birthday...a double whammy of energy and focusing on what I "Want" and what I "have" to do!  haha
Anyway...here are some dolls that absolutely must get completed!!!  One will be going to Holland to my Over the top...talented friend Marijke van ooijen....she's gotta be "real special"!!!    And another is going to Totowa NJ..to my good friend Alison.  I grew up with Alison...and when I was 15 she was in a very bad car accident...I made her this plaster decoupaged book with a little girl in it...and 35 years later...she still has it!  Sometimes friends are there to remind us of our future dreams and our "now" accomplishments...A never ending story!

So I am also working on an etsy shop where I will sell some dolls and also some sculpting tools and tutorials....Time...hmmm..I guess I'll figure it out as I go along....no big plan!  haha (Not that there really is ever a big plan....)
Start of some tiny candies....

Sunday, February 6, 2011

Little "Truffle" is done...Happy Valentines Day!


Tiny Red Valentine boots Designed from my Favorite Boots! 

Truffles Peanut Butter cup hat...Top stamped, highlighted and glossed!


Well. its almost Valentines day....and I completed my doll before the holiday!  I am usually behind the "eight ball" ......and the doll never gets done in time...but the weather made me just SIT and "BE" ! I am thankful for this lousy cold snowy weather!!!!

So I think this Doll feels like  a "Truffle" ....So Be it!! (i think its a cute name....and some day if I ever get a chocolate color cat, I will name her "Truffle" too!) 

OK, anyway.....DETAILS!!!!  Her Valentine Heart on her dress was "Heart" stamped out of red polymer clay, I cut a hole in the center before baking...then I took all of the tiny candies I made and arranged them to fit snugly inside (That took a good hour and a couple of cracks in the heart because I had to find the right combination for the candies to fit with no spaces..ugh! they are so tiny, I thought I would have a breakdown...

Boot pattern cut from paper towels

Soft Pink Leather painted with RED acrylic

Her RED Boots are my favorite Part of this Doll!  I did the boots differently this time...instead of attaching the leather directly to the sole, I made a pointy toed boot cardboard sole first (I made it longer so i got a very fine point that would be able to curl up...(JUST LIKE my FAVORITE cowboy boots that I ADORE!).  I then attached my leather pieces (That I had to paint red because I had no RED leather, I sealed with Super Matt spray by Duncan...they actually came out very "worn" ..just what I was looking for!)  to that, gluing "UNDERNEATH the cardboard (I usually glue inside the  already baked polymer sole...very tricky when something is this Tiny).......Then I made the same pointy sole in polymer,  a teensy bit larger, and attached that to the cardboard, then baked the entire shoe...WOW..the boot came together with much more ease....that is not to say that these boots were quick and easy....they took a good part of my day to make...but I couldn't be happier with how they turned out!! haha!

And Finally her Hat...oh my...we tried MANY hats..... But this is the Hat for her!!!  It is made from polymer, BY FORMING in a Wilton peanut butter cup candy mold.  At first I tried making it look like a peanut butter cup, but it didn't look right with the top not covered in chocolate....and the only way to see the peanut butter would be to take a bite out of it....hmmm, I just wasn't feeling it....I tried to make the chocolate on top sink, but as I was attaching the thin layer of chocolate to the top...it "Pouffed out"   and I thought...OMG it looks like a TAM! one of my favorite hats when my daughter was little! Still a little too "plain...so I stamped it with a valentine s word stamp....and i added a tiny bonbon candy to the top.
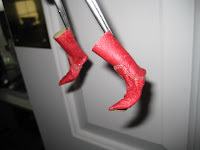
Leather glued "OVER" a cardboard sole

Monday, August 2, 2010

Last Bon Bon Babe Chocolate! Start of Halloween Dolls!


I completed the last Bon Bon Babe...she is a Chocolate Bon Bon!  The striped fabric reminds me of a fancy candy wrapper, the ones that are twisted on both sides ...so I tried to make her have a Puffy "Wrapper" type dress.  I stamped a  tiny harlequin design with distress ink on pale yellow fabric, and it appeared gold and matched the striped dress....Like A "miracle" !  Stamps are such a cool tool...allowing you to design your own fabric! 


Her Chocolate hat was formed with two tools.... I found a kids PLAY DOUGH set with some cool "sweets" molds.  One of them was this candy with a "Dallop" shape on top.  I put a sheet of chocolate colored clay in the mold, and then used one of my "Cupper" balls to squeeze the clay and form this perfect little hat!  I used Texture squeeze paint for the chocolate drizzle...then glossed it with Triple thick...adding tiny handmade polymer candies and a silk ribbon bow. 

She has "Candy jointed arms too! I created two strawberry topped chocolate beads in between two filigree bead caps...I added some silk ribbon to match her dress. 


And now its time to start some Halloween fairies!  I pulled out all of my halloween prints, I tea stained most of them for a "Vintage " feel....  I found a very cool piece of Vintage Black and Orange striped  Velvet ribbon...I can't wait to use it! 


NY wow

NY wow
dIANE kEELER CLASS

Diane Keeler Class

Diane Keeler Class
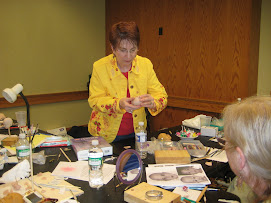
Diane Teaching

Diane Keeler class

Diane Keeler class
Class Picture

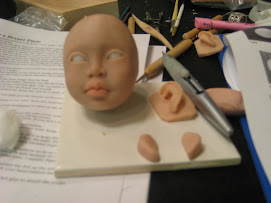
Sculpting a Childs face

Sculpting a Childs face
My face ..Day 2 ..ready for EARS!

Working on a new face now!!!

Working on a new face now!!!
Completed face and breastplate

Attached head to breastplate

Attached head to breastplate
The clay is very dirty..the cleanest i can get it!

After Face Make up

After Face Make up
WOW...it gives a translucent glow...hid the dirt!

Removable wig...not styled or cut yet

Removable wig...not styled or cut yet
Goat mohair that was dyed and combed

Now she's styled!

Now she's styled!
But it is a wig...it will be glued when i'm ready!!!

Painted Face...still needs brows and lashes!

Painted Face...still needs brows and lashes!
She will be sealed with Duncan flat mat as soon as it comes in the mail!

Cloth Pixie body fit under breast plate...

Cloth Pixie body fit under breast plate...
After drawing and sewing a million body parts....

Girly girl "21" charms

Girly girl "21" charms
Angelica's 21st birthday charms

Devon with his creation

Devon with his creation
Devon and his monkey boy

Devons Doll that he made from a pattern

Devons Doll that he made from a pattern
Monkey Boy

another charm group

another charm group
Debbies Charm

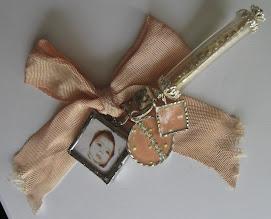
Leapord tube charm

Leapord  tube charm
The diamond shape is a soldered glass bead.

Wax medium melted over polymer clay face....

Wax medium melted over polymer clay face....
She's getting there..i think this hair suits her better..she needs eyelashes and ears

Odd Vintage bug- like Fairy

Odd Vintage bug- like Fairy
Just the idea

Clay Window glazed with Utee

Clay Window glazed with Utee
Stamped Utee glazed "Charms"

Clay Charms

Clay Charms
Making a mold from a charm to make more charms!

Charming

Charming
Clear tubing and stamped Utee

Charming!!! ....REALLY!!!

Charming!!! ....REALLY!!!
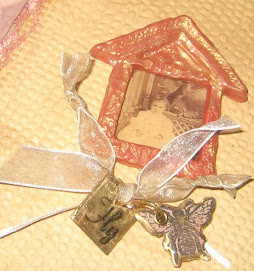
Soldered Vintage photos

Charming!!! ....REALLY!!!

Charming!!! ....REALLY!!!
Soldered Charms

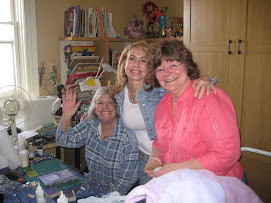
Journal Day with Tery and Stephanie

Journal Day with Tery and Stephanie
Creating an Art Journal

Stephanies journal

Stephanies journal
of course..completed first!!

New Art Journal

New Art Journal
Journal made from SCRATCH!!!

Art journal EMBELLISHMENTS

Art journal EMBELLISHMENTS
Clay, Stamps, Utee

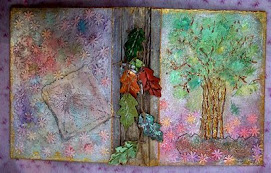
Inside cover

Inside cover
Material and free motion stiching

Celeste

Celeste

Celeste up close

Celeste up close
Celestes shirt is made from gessoed and tinted lace with free motion embroidery

EVA

EVA
She is with her new mom Evelyn