Create Clay Hats and Crowns!

Create  Clay Hats and Crowns!

Friday, January 28, 2011

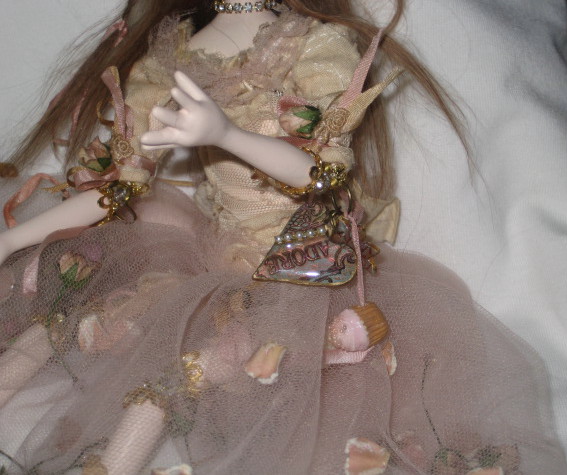
Valentine Wire Joint Doll


Valentines day is coming up ...and a doll is half way there!  The came fast...But, its what I'm trying to do with her that I am lolligagging around with.  I Know what I want to say with this doll...but I sewed all day...and nothing worked...right at the end after I shut my shop light off...an Idea hit me!!!!   So I will try again!!!   TOMORROW!   


For Now...here is how she started and where h is right now.  I patina'd the gold findings with Gilders Paste and then matte sprayed them...In my stash, I found "Cool" square beads in the exact same color as the patina and I thought it was a very vintage look.....BUT....when I used the "SQUARE" beads...it limited how far the arms and legs will bend...a round bead works like a ball joint and allows total movement.  I had already glued the wires inside the body parts so this is a "Lesson Learned"!!!   But she poses just fine...sitting or standing..I would have had just a little more freedom with a round bead.

This Dolls HEAD was done different than girl Interrupted...(her head and bodice were one piece. )   This head was sculpted separately and I made it fit onto the separate neck like a ball joint so it swivels smoothly in all directions.  I love this because now the doll can look around...it gives her "Personality" and freedom to be posed. 

I also worked on these tiny candies for a couple of hours.....I even made the tiny candy papers...they will become a heart shaped box of candy some how incorporated into the  doll...wether she wears it or holds it....only my "spirit guide " knows ...(haha..seriously...)


Wednesday, January 12, 2011

Charm School!


So this is the second part of Girl Interrupted....It is the meaning of the doll!  She is actually a "Journal" for my daughter who is traveling between being a teenager and an adultt, and getting mixed up along the way in substance abuse.  The petals in her dress are Proms and grammar school dances gone by......her leopard kitty dolly and  Leopard Boots, are her "Funky" style that I love.....a crown for the "Princess" she truly is!  The Handmade Charms are "Tiny stories" of where she has been and what she holds inside.

These charms were created from polymer clay. A lot of my "New charming" experience , came from Amber Dawn, a miniature charm artist and a very good friend  (who actually Created a NATIONAL CHARM DAY!!!!  Hooray!!!)  I used stamps for design,texture...and words. I used all types of mediums including sparkles, acrylics, alcohol inks, ink pads, gilders paste, crackle finish, resin and triple thick,  for shine, sparkle, texture and color.  

I had found out about Gilders paste from a magazine, and my friend Tery picked them up at a bead show....WOW!!! I quickly ordered them...and I'm loving what they do!  (They can be used on all surfaces...)


I used a light cured resin system and I love the beautiful shiny hard domed result that I get.  After I  "resined-up"  some of my charms, I was able to drill holes for my connections,  with no problem.

Well, " Girl Interrupted"  is compete and its time to "move on" to new dolls! 

Thursday, January 6, 2011

Some processes of Girl Interrupted

Mezmerized by a found "Charolotte"
 
As I am working through  parts of the doll, I took a few pictures to document some processes.  Sometimes a picture is worth a "Thousand Words"!!  haha! Really!


So As I tried to Wig this doll, She found a tiny Frozen Charlotte that she became "Mesmerized" with...ugh!  She would not let me Wig her!...... (just kidding, I got too tired tonight!)


I Created her crown and Little Boot "Soles" from polymer clay that I ran through the pasta machine. Running it through, gives you a perfectly smooth thin uniform piece of polymer so everything comes out evenly.  First, for the crown,  I  "ink stamp" the clay for color and texture. 


I am a "Findings" Freak!
 
  I cut out my crown shape with an exacto using a handmade template place lightly on my stamped clay. I smooth the edges for a "softened" look, then I put the clay around a metal form (piece of 2-4 inch metal tubing). At this point I add wire where ever I want to add beads and crystals.  After baking the crown, I loosen it from the form with my exacto.  I then layer after layer..blah blah blah..alcohol inks, dry brushed acrylics, crackle medium, triple thick...whatever, then I add my findings  and gems!!!!  There you have it!


Funky Leopard Boots are  about 1/2 size of my pinky!
 
For my boots, I created the polymer soles with the same type of template...adding an arch...then I shape the fabric around the soles with a PRO tool and my fingers, using fabritac and a lot of  "patience"!!! I found  the tiniest ever metal lace holders. 


<><><><>
<>
<><><><>
<>
And Kitty doll is complete!  Her Crown was created from  a polymer clay "Leopard" Cane...(taught to me by Amber Dawn...Miniature extraordinaire!!!!) decked with diamond Crystals. She has a Leopard mohair sweater from fabric that was given to me by my very dear friend, Mary Louisa Klawetter...Its very special, so I only use it for tiny things so it "Lasts"!!! haha   and Moon (a naked pink sphinx cat)   , My inspiration for Kitty Doll....Loves to "Eat" Tulle...Now I have to hide this doll in the cabinet......
Jewel Joints and Bloomers
                 

Friday, December 31, 2010

Art IS paperclay doll...moving along!


I am so inspired right now...By everything around me...So many Ideas that I want to put out into this doll...Now I am in the home stretch and I'm getting siked to Wig her.  But I have to get her outfit together...then i will know how her hair should fall.  Sometimes it just works out like that!

I have "Jewel jointed her with metal findings , stones and shimery beads.  She really is poseable and even a little "dangly"!!!!!

I have a ton of "Vintagy" fabrics ,ribbons, and Doo dads that I am "Auditioning". 
I had beautiful  tiny vintage Crepe roses that I tea stained that I will definately use on her....They look "old" but "Pretty"......

Tuesday, December 28, 2010

"GIRL iNTERRUPTED "2011 "Art is" paperclay doll


I am late with my my 2011 "Art is" doll....but she is coming along!

 She is a full paperclay doll consisting of separate body parts that are wired together with gems and findings.  HER BODY WAS CREATED FROM A FOIL CORE AND COVERED WITH PAPERCLAY.  THIS IS MY FIRST SCULPTED BODY...SO IT IS A BASIC SHAPE. BUT I want her to be a "doll" and not a "sculpture" !  Her Wired joints can bend and her legs and arms "DANGLE"! 

This little girl will have a "KITTY DOLLY" ...The kitty is also a tiny FOIL CORE with WIRE and PAPERCLAY sculpted over the FORM.  Her arms and tail are separate on wire so they can move.  She will be sanded smooth and shiny, painted and I'm "seeing" a vitage dress on her!!! haha  After she is pulled together...I have silky "lama" hair washed and brushed waiting for her to be  WIGGED!!!  and then on to the CROWN  and COSTUME!!! 


Monday, December 20, 2010

Wow I better blog!!!!! Merry christmas!

Wow, I think I am coming alive again...gotta blog this week...Anyway...Merry Christmas....I ll post the start of some new dolls this week!  Colleen

Thursday, October 14, 2010

ART IS "You" Tiny paper clay doll class and Pictures of Art Is


Miss Minnie and Barbara


JUDY!
Dolls drying after being sealed with Super Matte Spray


Really Focusing! Miniaturist Naomi in the center 


Missy and Sylvia 
 Well, Art is you has come and gone!   What a wild ride!!!  It was fantastic...and I'm still all confused now that I'm home!  I have seen so much inspiration....learned so many new techniques ...found out about new tools and gadgets and doo-dads!   A Billion new art friends!  It's hard to get back to "reality"!!!

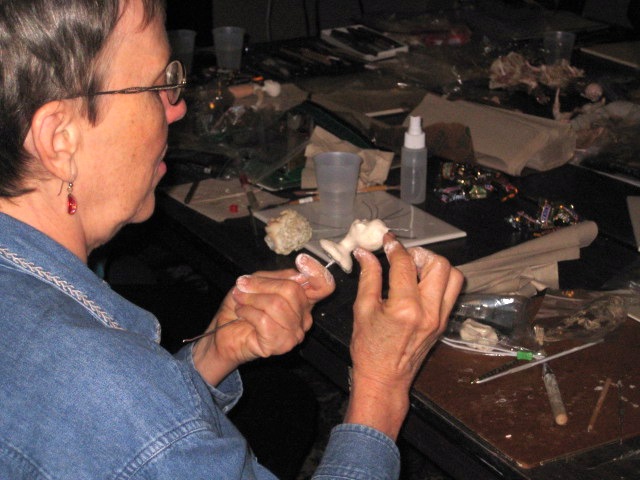
But the Tiny Doll 2 day class went great!  Everyone created a doll....and the girls were so excited that they could hold it in their hands....and admire these tiny works of art!  Each one of the dolls took on life and I am so proud of everyone, especially for the girls that have never made a doll, or worked with paperclay.  This was one of the best experiences I have had making dolls and doing art !!!


Class Working Hard...Christina creating her first Doll!  
Joyce Creating her Ballerina Fairy!


Mary working in Keith LoBues class
Keith Lobue Metal etching class WOW!
Sallianne "Acting out"!
"Glinda"....ugh I mean Kecia!
Suze Weinberg..Encaustic class....So Cool!
Teri in Suze's Class...So Happy!


Pamela Huntingtons Tiny fairy book class (this is her book!)...Fantastic

BonBon Baby auction Doll for the babyface Foundation

Sunday, October 3, 2010

Glinda Girl...Good Witch Completed for Art IS You East Coast Retreat!


Glinda Girl is complete....She is a Vintage Fairy doll....she is a little bigger than my usual 5 inch dolls...I "d say 8 inches...I think I can get a little more detail easier with this size in paperclay.  She has a lot of Vintage pointy back crystals and findings  that I have found on Ebay....I love finally using some of my "Hoarded finding purchases" ....Most of the time...after I buy them...I don't use them because I'm afraid I'll use them up...ok...so when "DO" I use them??!.....I think this is a "sickness"........

Her hat was created using this cool form that Jimmy thought of ...a wine aerator !   It helped me to form the perfect witch hat from polymer clay.  While the clay was on the form, I pressed a pretty stamp into it, then after baking...I dry brushed  with acrylic paint, then used a gold rub-on and Gold leaf pen...tiny vintage pointy back crystals were glued in place with Gem tac by beacon....i love this product !

Her Wings were wire-shaped on a pegboard, glued to a shimmery wrapping paper that was hit with a heat gun.  I painted them with 2 part resin...then added metal findings, gems and no hole beads. We will be creating this type of wing in my "Embellish The Doll" Class on Sunday.....

ANY way...the countdown is on....Wed. I hit the road for Connecticut and I cant wait till I get to my hotel ,,,this is the first time I have ever attended ,an Art  RETREAT!!!   I can barely "contain" myself!!!


NY wow

NY wow
dIANE kEELER CLASS

Diane Keeler Class

Diane Keeler Class
Diane Teaching

Diane Keeler class

Diane Keeler class
Class Picture

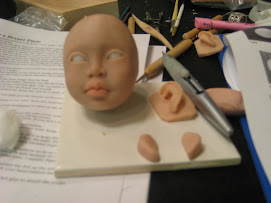
Sculpting a Childs face

Sculpting a Childs face
My face ..Day 2 ..ready for EARS!

Working on a new face now!!!

Working on a new face now!!!
Completed face and breastplate

Attached head to breastplate

Attached head to breastplate
The clay is very dirty..the cleanest i can get it!

After Face Make up

After Face Make up
WOW...it gives a translucent glow...hid the dirt!

Removable wig...not styled or cut yet

Removable wig...not styled or cut yet
Goat mohair that was dyed and combed

Now she's styled!

Now she's styled!
But it is a wig...it will be glued when i'm ready!!!

Painted Face...still needs brows and lashes!

Painted Face...still needs brows and lashes!
She will be sealed with Duncan flat mat as soon as it comes in the mail!

Cloth Pixie body fit under breast plate...

Cloth Pixie body fit under breast plate...
After drawing and sewing a million body parts....

Girly girl "21" charms

Girly girl "21" charms
Angelica's 21st birthday charms

Devon with his creation

Devon with his creation
Devon and his monkey boy

Devons Doll that he made from a pattern

Devons Doll that he made from a pattern
Monkey Boy

another charm group

another charm group
Debbies Charm

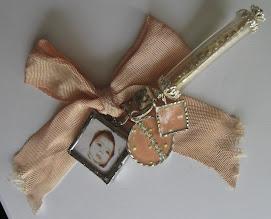
Leapord tube charm

Leapord  tube charm
The diamond shape is a soldered glass bead.

Wax medium melted over polymer clay face....

Wax medium melted over polymer clay face....
She's getting there..i think this hair suits her better..she needs eyelashes and ears

Odd Vintage bug- like Fairy

Odd Vintage bug- like Fairy
Just the idea

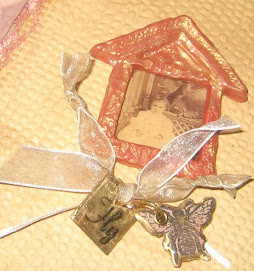
Clay Window glazed with Utee

Clay Window glazed with Utee
Stamped Utee glazed "Charms"

Clay Charms

Clay Charms
Making a mold from a charm to make more charms!

Charming

Charming
Clear tubing and stamped Utee

Charming!!! ....REALLY!!!

Charming!!! ....REALLY!!!
Soldered Vintage photos

Charming!!! ....REALLY!!!

Charming!!! ....REALLY!!!
Soldered Charms

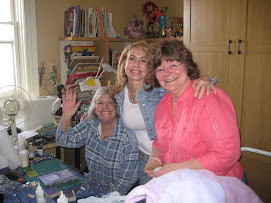
Journal Day with Tery and Stephanie

Journal Day with Tery and Stephanie
Creating an Art Journal

Stephanies journal

Stephanies journal
of course..completed first!!

New Art Journal

New Art Journal
Journal made from SCRATCH!!!

Art journal EMBELLISHMENTS

Art journal EMBELLISHMENTS
Clay, Stamps, Utee

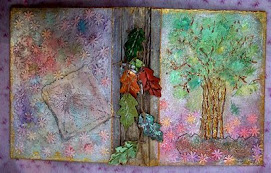
Inside cover

Inside cover
Material and free motion stiching

Celeste

Celeste

Celeste up close

Celeste up close
Celestes shirt is made from gessoed and tinted lace with free motion embroidery

EVA

EVA
She is with her new mom Evelyn