Create Clay Hats and Crowns!

Create  Clay Hats and Crowns!
Showing posts with label polymer clay. Show all posts

Friday, February 25, 2011

To Doll or Not to Doll Today! huh!


Bead Joints

"Moon" Cat Doll


A Charming Mood!


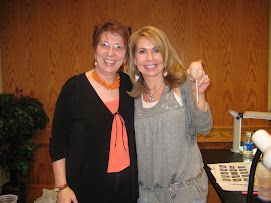
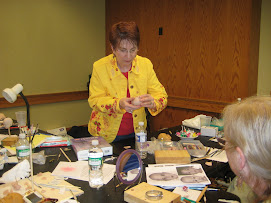
Hmmmmm..To Doll ...Or Not....! NO...i just have too many crazy ideas flying through my head...so I pulled out ..... a LOT of STUFF to just "Create" !   On Monday...I will be getting together with a group to show them how I created "Girl Interrupted's Charms....and for the Girls to show me some cool  "Charm" techniques that they do.  I am definately excited for this meeting...because this is what brings together..."The Energy that CREATES WORLDS" !!!!!!  Everyone bringing ideas and techniques to the table...I think its the Best kind of meeting. 


Today I also pulled out a Tim Holtz Book that I have "moved" around for a while...But today's the Day! This book is SOOO Interesting...Today....(You know what I'm talking about...something has to click before you "SEE IT"......
So,  I will play today with whatever I have at hand...(that's a "LOT"! haha) ...and see what I can come up with.  I will then use these new charms as inspiration for the doll I have started...but cant seem to continue!  I think this will be the boost I need.

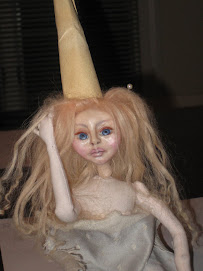
The paperclay doll that I started is being bratty...I tried to work in the "IDEA" of a ball joint doll using beads and making a type of Hinge....looks cool right?!  haha Well....it doesn't work!!  after trying different connection ideas..I chopped them off and and started something more basic..I guess I'll have to do more "Ball Joint" detective work....

I also started a cat...while looking at my "Live Model" MOON (my favorite cat-child in the universe).  I love the animals eyes I used...he already looks alive ...even without a mouth!

So these two dolls will remain in a "Coma like" state until I can blow some creative life into them

I started some thin polymer clay sheets (so thin...like paper), stamped.  after heating with my heat gun and baking the sheet to a cardboard feel...I used my new tiny punches that I found as leftover valentine merchandise...a tiny wing and elongated heart...whoa!! what a bargain find...this was the only one there! I also cut out some tiny kemper cutter flowers...shaped and texture stamped....and Then started fooling with all kinds of mediums...crackle, triple thick, texture glass....rock candy stickles..acrylics...and my new favorite stuff....Gilders Paste....so here is a starting point...gotta get to work....I'll come back with results and techniques!   


Wednesday, January 12, 2011

Charm School!


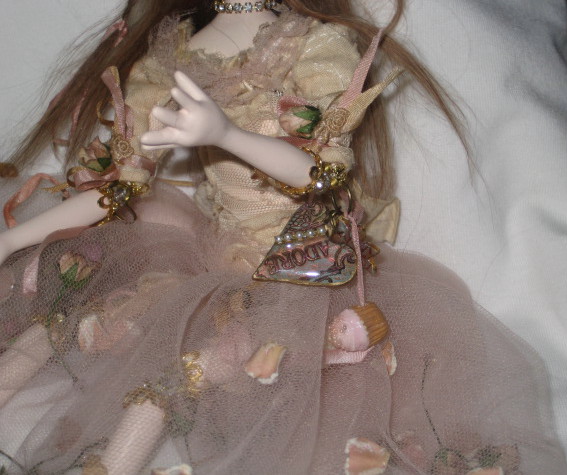
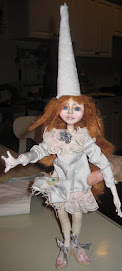
So this is the second part of Girl Interrupted....It is the meaning of the doll!  She is actually a "Journal" for my daughter who is traveling between being a teenager and an adultt, and getting mixed up along the way in substance abuse.  The petals in her dress are Proms and grammar school dances gone by......her leopard kitty dolly and  Leopard Boots, are her "Funky" style that I love.....a crown for the "Princess" she truly is!  The Handmade Charms are "Tiny stories" of where she has been and what she holds inside.

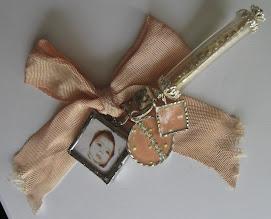
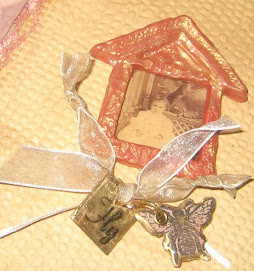
These charms were created from polymer clay. A lot of my "New charming" experience , came from Amber Dawn, a miniature charm artist and a very good friend  (who actually Created a NATIONAL CHARM DAY!!!!  Hooray!!!)  I used stamps for design,texture...and words. I used all types of mediums including sparkles, acrylics, alcohol inks, ink pads, gilders paste, crackle finish, resin and triple thick,  for shine, sparkle, texture and color.  

I had found out about Gilders paste from a magazine, and my friend Tery picked them up at a bead show....WOW!!! I quickly ordered them...and I'm loving what they do!  (They can be used on all surfaces...)


I used a light cured resin system and I love the beautiful shiny hard domed result that I get.  After I  "resined-up"  some of my charms, I was able to drill holes for my connections,  with no problem.

Well, " Girl Interrupted"  is compete and its time to "move on" to new dolls! 

Sunday, May 23, 2010

Making Leopard Canes with Amber Dawn


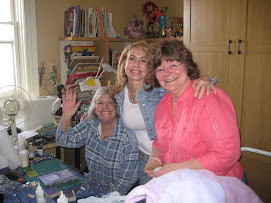
Well, last week was another "mini" class at the Purple Petals Studio in New York!  Myself, Tery and Heather took the trip into the city to learn more Claying Techniques from Amber Dawn.  Amber was ready to teach us whatever our little hearts desired!!! 


I forgot that I mentioned to her that I would love to learn creating Leopard Print in clay.....As Amber took out her clay and samples of work...Something "UNBELIEVABLE" caught my Eye!  O M G!  TEENY TINY Leopard print made from polymer!!!~  I didnt believe that that was possible...How did she make it look like Leopard...How did she get it so tiny??? The possiblities of using this in my doll making was making my heart race...Crowns, shoes, ...blah blah blah...So she is asking us...so what do you want to do?  and I'm looking at everyone like..."Nah I dont want to do leopard...Right!!!!!!!???   Every one loved it...and they all agreed...We had the best day learning this designing/reducing technique!  I was High when I left there...It felt like I received a very "Cool" Gift!


This is how the Design started...and these tiny pieces are what we ended up with!  We all worked on this print together..Wow!  I love it! 

We all created Beads in class, and Amber gave me the two samples she made....see the picture .  I made the tiny pocketbook charm when I got home after Amber showed us her pocketbook making technique....it is very small...like a Penny!

We will be getting together with Amber Dawn to learn more techniques next month!


Saturday, May 15, 2010

Tiny Polymer Mixed Media Doll Class...More Milo Files!


This Tuesday,  Our  "Secret" group met and created new "Milo files"......I had the pleasure of teaching the group my TINY Fairy Mixed Media dolls, but in Polymer  (most of my tiny dolls are paperclay).    Heather has sculpted, but never this tiny...and Doreen and Sue have never sculpted with polymer., both of them are new to dolls!    Everyone felt that they would do better in polymer.  I agreed that polymer takes detail easier, but PAPERCLAY CAN ALSO BE EASY IF YOU USE LESS DETAIL IN SCULPTING, AND USE MORE "PAINTERLY" DETAIL.   IN THE END, WHICH EVER MEDIUM YOU ARE WORKING IN.. IT IS EASY  AND FUN TO CREATE  A TINY MIXED MEDIA DOLL!!!!!
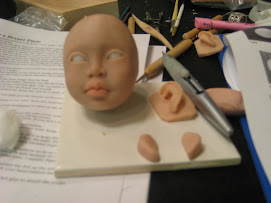
 These are the two dolls that I am working on with the class.  The larger one was the first doll created..and it literally "Crackled when I baked it.  I had such a hard time with the first batch of clay...after this happened ..I threw out the clay...maybe it was old!? I never ran into this before...so I started on the second one (to the left) and I like her much better, she is tinier and has nicer detail.  Maybe I will try and crackle that first doll as suggested by Heather! hmmm!  maybe she will work out after all! 


The crown was created for the second tinier doll...I 'll try and incorporate the vintage black and white Diamond design into her outfit. This picture doesnt show the correct color of the diamond design...It is worn out black and pearl white!
 I arrived at Sues with some sample dolls as a guide for size, and also a kit for each Person!  The kit contained the conditioned clay .... (I used Prosculpt with  Bisque Cernit mixed in for a soft yet blendable clay.), pre made foil head/bodice armatures, "SKIN" fabric, Prepared Silky Mohair, Eyelashes and Triple thick for glossing the eyes and lips, shoes...

Of course we had a little bit of "Christmas" first!!   Doreen made beautiful beaded bracelets for everyone...gifts of "Crafting items" were flying around  and Sues daughter Carol even stopped by and gave each of us a beautiful handmade Beaded ring!  What  an "INSPIRING" day!


Anyway,  after much Chattering about Techniques and Products  the class really went great!...and in a few hours everyone was able to bake their fairy head and bodice.  I showed them how, after baking...small changes can be made by carefully smoothing on a little clay and rebaking!  I usually use this technique to change the lips ,nose, or an uneven cheek  without it being visible.

Next Week we will create the arms, legs and soft body, and put the doll together.  Woohoo!  cant wait!

There are also some Pictures of the First part of this class, Tiny hats and crowns.  See the picture of everyones completed creations! WOW!


Friday, February 19, 2010

Tweener work for the next doll!~


So...I was feeling like I was in the need of trying some already learned and some New techniques. I Want my next doll to incorporate a technique that I have to learn ...and Then I'll apply that technique to the doll.

I Finally got to watch a bunch of DVDs that I ordered!  I really picked up a lot of cool things.  The Four that I really loved were by Beryl Taylor, Ruth Rae,  Tim Holtz, and Angie Scarr.


I am only in the beginning stages, right now...I started by creating a bunch of Fabric papers, with muslin, tissue papers, colorful napkins, and some Vintage ephemera that I had.  I coated some old book pages and a part of my handmade papers with 2 part resin...to make this very cool..glass like paper, the book pages actually came out translucent shiny...I want to cut that into  shapes with my sizzix, then add stitches and findings. 


I tried the very cool technique of heating thin pices of polymer with my heat gun...and then using a paper punch to cut designs. I took this a couple steps further...by rolling thin sheets of clay, dusting with perfect pearls,  then texturizing with stamps, some inked ....then baking so that its hard and flexible.  I punched my desings...then used more perfect pearls, rub on colors, paint pens..then glossed them with triple thick...I love the embellishments you can create with this simple cool technique!


I found the best paper punches that also have matching stamps (3 designs)  that snap right onto the punch, so you dont lose them...the stamps really add depth to the clay design...These were Martha Stewart paper punches..WOW!

NY wow

NY wow
dIANE kEELER CLASS

Diane Keeler Class

Diane Keeler Class
Diane Teaching

Diane Keeler class

Diane Keeler class
Class Picture

Sculpting a Childs face

Sculpting a Childs face
My face ..Day 2 ..ready for EARS!

Working on a new face now!!!

Working on a new face now!!!
Completed face and breastplate

Attached head to breastplate

Attached head to breastplate
The clay is very dirty..the cleanest i can get it!

After Face Make up

After Face Make up
WOW...it gives a translucent glow...hid the dirt!

Removable wig...not styled or cut yet

Removable wig...not styled or cut yet
Goat mohair that was dyed and combed

Now she's styled!

Now she's styled!
But it is a wig...it will be glued when i'm ready!!!

Painted Face...still needs brows and lashes!

Painted Face...still needs brows and lashes!
She will be sealed with Duncan flat mat as soon as it comes in the mail!

Cloth Pixie body fit under breast plate...

Cloth Pixie body fit under breast plate...
After drawing and sewing a million body parts....

Girly girl "21" charms

Girly girl "21" charms
Angelica's 21st birthday charms

Devon with his creation

Devon with his creation
Devon and his monkey boy

Devons Doll that he made from a pattern

Devons Doll that he made from a pattern
Monkey Boy

another charm group

another charm group
Debbies Charm

Leapord tube charm

Leapord  tube charm
The diamond shape is a soldered glass bead.

Wax medium melted over polymer clay face....

Wax medium melted over polymer clay face....
She's getting there..i think this hair suits her better..she needs eyelashes and ears

Odd Vintage bug- like Fairy

Odd Vintage bug- like Fairy
Just the idea

Clay Window glazed with Utee

Clay Window glazed with Utee
Stamped Utee glazed "Charms"

Clay Charms

Clay Charms
Making a mold from a charm to make more charms!

Charming

Charming
Clear tubing and stamped Utee

Charming!!! ....REALLY!!!

Charming!!! ....REALLY!!!
Soldered Vintage photos

Charming!!! ....REALLY!!!

Charming!!! ....REALLY!!!
Soldered Charms

Journal Day with Tery and Stephanie

Journal Day with Tery and Stephanie
Creating an Art Journal

Stephanies journal

Stephanies journal
of course..completed first!!

New Art Journal

New Art Journal
Journal made from SCRATCH!!!

Art journal EMBELLISHMENTS

Art journal EMBELLISHMENTS
Clay, Stamps, Utee

Inside cover

Inside cover
Material and free motion stiching

Celeste

Celeste

Celeste up close

Celeste up close
Celestes shirt is made from gessoed and tinted lace with free motion embroidery

EVA

EVA
She is with her new mom Evelyn