Create Clay Hats and Crowns!

Create  Clay Hats and Crowns!

Friday, February 19, 2010

Tweener work for the next doll!~


So...I was feeling like I was in the need of trying some already learned and some New techniques. I Want my next doll to incorporate a technique that I have to learn ...and Then I'll apply that technique to the doll.

I Finally got to watch a bunch of DVDs that I ordered!  I really picked up a lot of cool things.  The Four that I really loved were by Beryl Taylor, Ruth Rae,  Tim Holtz, and Angie Scarr.


I am only in the beginning stages, right now...I started by creating a bunch of Fabric papers, with muslin, tissue papers, colorful napkins, and some Vintage ephemera that I had.  I coated some old book pages and a part of my handmade papers with 2 part resin...to make this very cool..glass like paper, the book pages actually came out translucent shiny...I want to cut that into  shapes with my sizzix, then add stitches and findings. 


I tried the very cool technique of heating thin pices of polymer with my heat gun...and then using a paper punch to cut designs. I took this a couple steps further...by rolling thin sheets of clay, dusting with perfect pearls,  then texturizing with stamps, some inked ....then baking so that its hard and flexible.  I punched my desings...then used more perfect pearls, rub on colors, paint pens..then glossed them with triple thick...I love the embellishments you can create with this simple cool technique!


I found the best paper punches that also have matching stamps (3 designs)  that snap right onto the punch, so you dont lose them...the stamps really add depth to the clay design...These were Martha Stewart paper punches..WOW!

Sunday, February 7, 2010

Tiny Fairy complete....


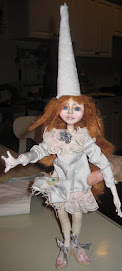
This tiny fairy is now costumed and complete!  She has organza that was melted into layered flowers on her skirt and pants.  The top part of her skirt was an old shirt of mine that i tea dyed, and her shirt was gold and ivory ..also tea dyed...after I put the outfit together...It  didnt work for me..., so I used a tiny brush and acrylic paint to add the pink to the shirt..., then I made some tiny clay flowers, dusted with perfect pearls...they were glossed and I added pink crystals.  


Her boots were painted that same mauvy pink as the shirt ... adding  ivory polka dots..glossed them and added crystals.   Her tall crown is made of polymer, stamped for design and texture , dusted with perfect pearls ...metal findings and wires for holding gems were added before baking. 

Friday, February 5, 2010

A Tiny Sad Fairy!!


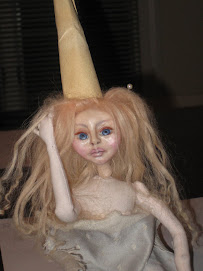
This new fairy is very small...she is a little smaller than the tiny dolls...She turned out kind of sad and she seems to be "longing" for something (hmm ..the accessories may express that)  ...so I'm going with it!!!  I was able to really smooth her parts out nicely sanding with a medium sponge, then sand/smooth with my micro sanding cloths at 400, 600 and 1200 grit (i am now selling them on ebay )!

 Her Hair is natural lama hair ..not Dyed, its very soft and wispy..   

I have put together some vintage Fabrics. and i found this weirdo fur scarf at a flea market last summer...maybe it will be the collar of her dress..... I will costume her over the weekend. 

 I want to paint pink/mauvey boots with tiny polka dots...i'll see what happens!!  I'm thinking the Amber wings are going to go better with this  idea now....
The wings i have with her...are too sparkly for this  sullen fairy


Monday, February 1, 2010

Wednesday, January 27, 2010

Wings ...Day 2!


So I "Worked" on wings again today.  I went in many different directions...and failed a couple of times...but now I feel like I'm getting  "Some where else"!!!!


The rust thing worked so cool...In the morning...there were small rust spots on the wire that I treated last night...but I remembered reading ..Apply in thin coats...to get a heavier effect.  So I did one more coat...and I LOVE  what it looks like.  I now have a "Rusty old pair of wings" from a fairy that has been lost out in the elements for years and years!  I found this crinkled mat shimmer  type paper that was for making bows...cheap stuff... I glued it to the rusty frames and hit it with the heat gun...maybe because it was cheap...It  tightened smoothed in an instant..leaving those tiny crinkles all around the edges next to the wing frame, but remaining So Crystal Clear everywhere else! 

 I dont know if I really captured it in the pictures, but the wings look like rusty old window frames...with  that old looking glass that has "Frost" on the edges because its so "fridgid" out!  These are my favorite wings...because I keep seeing these old windows to some old forgotten place! 


Then I did a "shimmer" pair that I am pretty happy with...The frames were wired around a wing design that i took from a wing art cd printed on a clear plastic sheet (its 4 seperate wings wired together.... I then used Ranger Gold alcohol ink mixative to color the wire...It gives it a more Matte metallic look.  I used the sheets of angelina glued to the frame and "zapped" with heat!  Then metal findings were also colored with the gold after being attached.  I coated the wing with Triple thick closs coating.  After drying...I added gems...Actually its still not dry...I just had to finish them! hahah! 

Tuesday, January 26, 2010

Workin' on Wings!!!


OK...so I have a ton of information on wings...But when i started to work on them...well...NOTHING was working!  I began this wing thing frustrated...BUT then I started to flow!!   I  saw a picture of these wings done in a cool book called Enchanted Adornments by Cynthia Thornton. The Wings were shaped with wire...then  tissue paper was glued on the back..and then they were dipped in resin.  So I startted working on them...I didnt like the tissue paper idea...so i used angelina in a sheet...i cut around the edges after gluing...then hit it with the heat gun...it tightend the sheet around the wire, putting a few "pretty " holes in the wing and , pearlized it!  I took my wings a little farther and added some ornamental metal findings...I used two part resin , and then finished it off with vintage diamonds.  These wings are for a tiny doll..now I will base her clothing around the wings.


I did the second pair...wiring them also...but instead of the resin, i used triple thick glaze....


and for the third pair...I did not wire veins...I dipped the wing with findings glued in place,  in  melted Utee ...then after hardening, I added one more set of findings and diamonds .


The last pair is in progress...and this is the one i'm most excited about!  I read in the Jan/feb issue of somerset studio, an artist that uses a metal paint...and then a solution to rust it, and she uses it on most all surfaces...i'm thinking of vintage worn wings and crowns...ugh!!! the possibilities!!!    I was on a mission, where do i find this stuff...i go back to the magazine...she DOESNT TELL!!!  hmm...where...then ...i'm thinking...hey wait a minute...i think i have something like that...i search my shop...where is that stuff??!   FINALLY....I find it...I got it in the city last year...and never tried it...I got iron, bronze and copper metal paints...and green, blue, and aging dark patinas!!! hahahaha   so I tested it on a bad wing and a piece of clay!!!  OMGOSH...it works...I have rust!!!  so I wired a new shape wing and painted them...dried the paint...and then put the solution on and left it for tonight to "RUST"!!!   I think these are going to be Very Cool wings....


Monday, January 18, 2010

Lillian Alberti Paperclay Doll Armature Class

Wow!!!  This weekend I hosted an armature class by Lillian Alberti at my house !  It was a fantastic weekend,  we learned so many valuable techniques to creating a good strong armature. And we learned tips on celluclay and its ability to build up the armature, then finally covering it with a thin layer of paperclay.


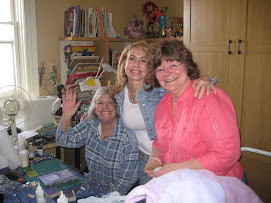
Everyone stayed  for the weekend... we ate good food, inspired each other.....and worked late into friday and saturday night!

This is a picture of Lillians mouse dolls that she just completed!  I love these dolls, they really are perfection...she made the little cakes too!

Also, Lillian with my "Moon",  he is a "naked" sphynx...some day I will make a little doll with "moon's" head!


Lillian was a great teacher, she was patient and just so inspiring!  I really appreciate her art and her ability to share her knowledge........


Monday, January 11, 2010

Lullabye League Body Parts Completed Today!


Today I got some time in to sand and paint the arms and legs of these tiny dolls.  I painted them with Hannie Sarris paints...this gives such a beautiful finish....I do love the easy coverage this paint gives.  I then  sprayed the parts with Duncan super matte spray.  It goes on shiny...but dries to a beautiful soft matte finish.


 I sewed up two tiny bodies using  a very easy pattern I created to fit perfectly into the paperclay upper bodice that I sculpt for these dolls...I Hollow the center of the bodice out, leaving a short armature wire that goes into a small opening at the top of the fabric body. 

I Hot glue the two parts snugly together. 

Thursday, January 7, 2010

Heads and bodices complete !


Today I worked on the other two "Lullabye League " dolls.....I sanded...painted and Wigged them. I gave them a soft shimmery look by dusting them with this pretty pink Channel face powder that I had...(Even after i sprayed them with super matte by Duncan) I think they will fit this group..They are gazing...which is "A Good Thing"...I needed them to be a little more "graceful"  than the last set of dolls....I feel like I accomplished that...and hopefully they will come "Alive " when I dress and Embellish them!

In This second picture I have competed their wigs...the first picture, I wet the mohair down and back...Training it a bit...then with some spraygel ...after it dried...I  brought it forward in nice waves!

Thursday, December 31, 2009

Lullaby League dolls moving along!


Moving along smoothly...I think it's the full moon! I'm on my last 2 dolls of the "lullaby League" Fairys from the wizard of OZ! I'm working on these dolls for the ART-IS retreat 2010. I completed the first doll...but the other two dolls that I origally started for this threesome...did not look like "lullabye Leaguers"!! haha But I think these two will be perfect. Sometimes I cant tell untill after I paint and Wig them....sometimes they Just want to be something else....

I also have completed four other head/bodices of Munchkin Fairies that will be part of this "Series".

On the top Picture..I have sanded one of the faces..and the other one needs to be sanded. You can see the big difference, that sanding the paperclay makes.

Sunday, December 27, 2009

Merry Christmas SCOTT!!!


WHEW! I did it! Finished my brother Scott's "Daddy Doll" on Christmas eve...by the skin of my teeth!! But I was very happy with the finished doll....When i picked it up...it was soft and cuddly and the picture I used of my dad from his childhood really came to Life!. This doll is a symbol of the Love my dad gave to all of his children. He worked so hard, and yet he "played" with us and all of the neighborhood kids loved...JOE! He was always funny...even in church...when the collection basket came around, and he had to give each of us four kids a quarter...he'd give us funny things to make us laugh in church...a nail clipper, a nickle that squirted water...One time he found a tiny inch worm dancing on this ladies perfectly coiffed Behive hairdo in the pew in front of us..They are some of my best memories!!! haha!

His clothes are made from Velvet fabric that came from Elizabeth Taylor's seamstress' "stash". (my dad loved that actress), given to my by my friend Tery. I had to cut around the Gold embroidered name...but the velvet is exquisite..feels so soft! and his boots are made from thin leather with tiny buckles and clay soles. His little scarf is made out of Fabric that says...When this you see, Remember Me!"


He has a beautiful vintage metal heart bead hanging from his shirt...because he was "ALL About Love and Compassion" ....Always!

Saturday, December 19, 2009

Ornament Exchange


I attended the Neptune Christmas meeting, and with my camera in my pocketbook...I didnt take one picture!!!! You get so excited to see everyone and hear about what everyone is CREATING...before you know it...its time to leave...and you forget you even have a camera with you!

So, these are pictures I took of my ornament that i made, and my good friend heather received, a tiny chair. I used an EPB pattern book called "A chaititable affair!" and then I minimized the pattern and put my own "twist" to it. The tiny heart pillow was created with a heart stamp on fabric and sewing and stuffing!

I Received, as my ornament ...the beautiful blue and silver decorated cone.....I hung it on my kitchen wall!


And I received a "Special" ornament from my good friend Stephanie...She is the beautiful Vintage looking angel. I just love the felt backing and the vintage laces used!


And last but not least, I received a birthday present from my good friend Tery....the coolest little embossing machine! Its new by sizzix...love that it looks like a pocketbook!! and I also got a pair odf Beautiful leaopard gloves!!!! Love them!


Every ornament that was given was beautiful and unique...and I'm mad at myself for not taking pictures!

Tuesday, December 8, 2009

Trying to finish 3 Tiny Dolls


TIME is getting "Tinier and Tinier" as christmas is gaining! I'm going to have to start baking cookies this week or the kids are going to get really mad! So i'm just trying to finish these 3 Tiny dolls, along with an Ornament for an exchange at the neptune Meeting, and finishing My brothers "Dad doll" for his christmas Present ! TodayI didnt feel too good...sore throat and achey...so i was able to lollygag around in the shop in my pajamas...and I completed one doll, "The lullabye League" doll....and i put together ideas for the other two...the blue doll will have a Bird"s Nest hat, and The other doll looks kind of "Christmasy!" in Red.


For Lullaby league, I made a lot of tiny flowers from polymer with my tiny lilac cutters, and the color looked horrible pink when done...so i used my "NEW FAVORITE" color from Americana paint (99 cents!!! ha!) Melon, and this beautiful liquid gold leaf paint...I love what the flowers transformed to...i didnt even glaze them because they looked cool vintage after I painted them and wiped them a little with a paper towel...

Tuesday, November 24, 2009

Mixed Media Journal Page


So...I created a mixed Media Journal page for a "Healing" Journal for my very good friend Stephanie Notaski. Of course I was late for the "giving of the journal", But the page could be added into the book (I think!) .


I tore this apart twice, before I came up with the "Wired Semi- flat" paperclay doll! I created the Head/Bodice and put holes in the shoulders while the clay was still wet. I did the same thing for the arms...then I wired the doll together, using wire, metal findings and beads. I used alchohol inks and gilded rub-ons on the wire and metal parts to age them, and I tea stained her clothes. The Background Is white fabric and handmade textured white paper free motioned with white thread and THEN painted...this was a different approach Than using different colored fabrics and threads.
I learned the technique from a new book called Stitch, Cloth, Paper and Paint by Angie Hughes. This is a beautiful hard cover book that has fantastic pictures and easy to follow instructions.


Saturday, November 14, 2009

Painting with Lillian!


This week I had a painting class with Paperclay Artist Lillian Alberti ! She is a fantastic whimsical Artist and I adore her painting. She seems to make her dolls come alive with the paint....We had a great afternoon painting and chit chatting in her Lovely Home...and she made a "killer lunch" !


I'm so excited because I think I left the class with something that I did not have before...I've never had painting lessons, so I didn't know about blending and shading....and color mixing is tough for me...I usually end up with "MUD"! I think I get the "blending" concept now...I just have to PRACTICE it!!


I sculpted a bunch of paperclay head and bodices...and Lillian painted one of mine as she taught me...So we made collaborative art...my sculpts and her painting ! She kept the first head and then she painted another of my heads for me to keep as a reference of what I learned...the one "dirty little faced" child in the middle is my painting!!!

NY wow

NY wow
dIANE kEELER CLASS

Diane Keeler Class

Diane Keeler Class
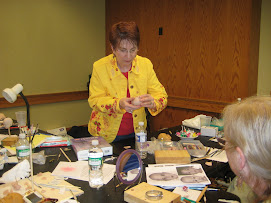
Diane Teaching

Diane Keeler class

Diane Keeler class
Class Picture

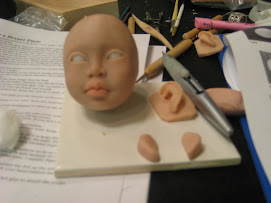
Sculpting a Childs face

Sculpting a Childs face
My face ..Day 2 ..ready for EARS!

Working on a new face now!!!

Working on a new face now!!!
Completed face and breastplate

Attached head to breastplate

Attached head to breastplate
The clay is very dirty..the cleanest i can get it!

After Face Make up

After Face Make up
WOW...it gives a translucent glow...hid the dirt!

Removable wig...not styled or cut yet

Removable wig...not styled or cut yet
Goat mohair that was dyed and combed

Now she's styled!

Now she's styled!
But it is a wig...it will be glued when i'm ready!!!

Painted Face...still needs brows and lashes!

Painted Face...still needs brows and lashes!
She will be sealed with Duncan flat mat as soon as it comes in the mail!

Cloth Pixie body fit under breast plate...

Cloth Pixie body fit under breast plate...
After drawing and sewing a million body parts....

Girly girl "21" charms

Girly girl "21" charms
Angelica's 21st birthday charms

Devon with his creation

Devon with his creation
Devon and his monkey boy

Devons Doll that he made from a pattern

Devons Doll that he made from a pattern
Monkey Boy

another charm group

another charm group
Debbies Charm

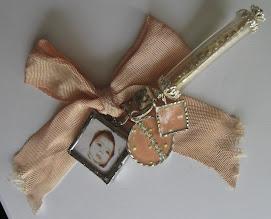
Leapord tube charm

Leapord  tube charm
The diamond shape is a soldered glass bead.

Wax medium melted over polymer clay face....

Wax medium melted over polymer clay face....
She's getting there..i think this hair suits her better..she needs eyelashes and ears

Odd Vintage bug- like Fairy

Odd Vintage bug- like Fairy
Just the idea

Clay Window glazed with Utee

Clay Window glazed with Utee
Stamped Utee glazed "Charms"

Clay Charms

Clay Charms
Making a mold from a charm to make more charms!

Charming

Charming
Clear tubing and stamped Utee

Charming!!! ....REALLY!!!

Charming!!! ....REALLY!!!
Soldered Vintage photos

Charming!!! ....REALLY!!!

Charming!!! ....REALLY!!!
Soldered Charms

Journal Day with Tery and Stephanie

Journal Day with Tery and Stephanie
Creating an Art Journal

Stephanies journal

Stephanies journal
of course..completed first!!

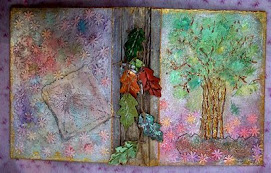
New Art Journal

New Art Journal
Journal made from SCRATCH!!!

Art journal EMBELLISHMENTS

Art journal EMBELLISHMENTS
Clay, Stamps, Utee

Inside cover

Inside cover
Material and free motion stiching

Celeste

Celeste

Celeste up close

Celeste up close
Celestes shirt is made from gessoed and tinted lace with free motion embroidery

EVA

EVA
She is with her new mom Evelyn