Create Clay Hats and Crowns!

Create  Clay Hats and Crowns!

Monday, August 23, 2010

Halloween is coming!

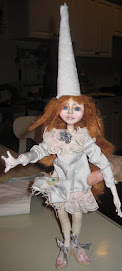
Top Hat Girl with a "Halloweenie on a Stick"

So I am really rolling with this years Halloween dolls....Top Hat girl is almost done...I have to finish her "Little "Halloweenie on a Stick" baby! The babies hat is a dyed silk cocoon and it will be more designed like a pumpkin....it also needs to be "stepped up a bit" with  embellishments and silk ribbons! 

She is paperclay really sanded and polished smooth ....with a soft body that has a new "Cool" armature inside...My friend Heather Brauner,  Dollmaker Perfectionaire!!!  taught me last week...I love it...you kind of build a little "cage" on the body...it shapes the body better...and the clothes seem to lay nicer!  THANKS HEATHIE!!! Check out Heathers site from my favorite  blogs  list. I will post a picture of this armature next post for the next doll.

Her top hat was made from premo clay over a wide metal  tube to create its shape..., I  "triple thicked"  it to match her Shiny Patent leather shoes!  This hat was inspired by my good friend Cindy Sowers...Millinery Extrordinaire!   You can check out her site in my favorite blogs List....A Dolley A Day!  (Love that name.....)

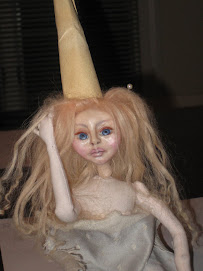
Chickie Corn Girl is complete...her clothes are Tea, Coffee, cinnamon stained, and her hair is wild and has braids and fabric strips weaved into it! 
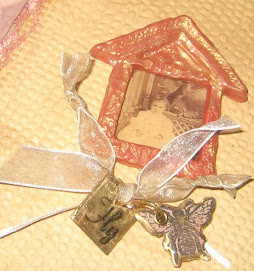
Her Chickie Corn hat and all of the hanging chickie corns are made from yellow, orange and ivory polymer clay.  Her Trick or treat pumpkin is a silk cocoon dyed orange, and decorated with vintage findings ..... I decopauged a "Tiny" vintage picture I found on the internet..My Very Creative friend, Sue Milo (from the Milo Files!)  gave me the idea after we both decided the pumpkin was sweet...but Boring!  That extra step  made the pumpkin  come to life..Thanks Sue!

Monday, August 2, 2010

Last Bon Bon Babe Chocolate! Start of Halloween Dolls!


I completed the last Bon Bon Babe...she is a Chocolate Bon Bon!  The striped fabric reminds me of a fancy candy wrapper, the ones that are twisted on both sides ...so I tried to make her have a Puffy "Wrapper" type dress.  I stamped a  tiny harlequin design with distress ink on pale yellow fabric, and it appeared gold and matched the striped dress....Like A "miracle" !  Stamps are such a cool tool...allowing you to design your own fabric! 


Her Chocolate hat was formed with two tools.... I found a kids PLAY DOUGH set with some cool "sweets" molds.  One of them was this candy with a "Dallop" shape on top.  I put a sheet of chocolate colored clay in the mold, and then used one of my "Cupper" balls to squeeze the clay and form this perfect little hat!  I used Texture squeeze paint for the chocolate drizzle...then glossed it with Triple thick...adding tiny handmade polymer candies and a silk ribbon bow. 

She has "Candy jointed arms too! I created two strawberry topped chocolate beads in between two filigree bead caps...I added some silk ribbon to match her dress. 


And now its time to start some Halloween fairies!  I pulled out all of my halloween prints, I tea stained most of them for a "Vintage " feel....  I found a very cool piece of Vintage Black and Orange striped  Velvet ribbon...I can't wait to use it! 


Thursday, July 8, 2010

Bon Bon Babes!


I have been working on these dolls for my upcoming class at purple Petals studio this Saturday.   They are Bon Bon Babes!  The little girl with the pink cupcake hat is complete.  I like this little doll because she seems different than what I usually do.  For her, I used a picture of a japanese doll that i liked.  She doesn't look like the picture.....but I liked using a "Guide"!  It really helped keep me on track of making the features small...it kind of gently "Nudged"  me..."NOW Col.. ,  do those lips look as "HUGE" as you are making them!!? " haha! 

Anyway...She is paperclay over foil and wire armature.  The bottom of her cupcake hat was made from a mold that I made from a little rubber tart I found for  $ 1.00...how cool is that?...and the top is clay that I sent for from japan that is like whipped cream, and then painted with acrylics and "topped" with Texture glass medium!  Well, its not as easy as they make it look...that little "dallop" of whipped cream took me about 3 hours to get it to look the way that I want.   I will have to ask Miss Amber Dawn, "sweets extraordinare" for an easier way! 


 Amber has inspired me to create the next doll....She is just in the idea stage, auditioning hair and clothes, but she'll definately wear the "Chocolate" hat...   The Hat was created over one of my wooden cuppers, then I used gallery texture paint to do the chocolate drizzle, then glossed the chocolat up with Texture Glass.    She is a chocolate Bon Bon...and she will have a lot of tiny candies on her outfit.  I made the tiny candies (below)  from polymer clay, but they are not glossed yet! 
                                                         I still have to make many more !


Sunday, June 27, 2010

Dolls in progress for class


I will be teaching Tiny Dolls at the Purple Petals Studio in Maspeth NY on July 10th and 11th , with the help of A fabulous Cloth and  Clay Doll Artist Heather Brauner.  Last week, Heather and I got together to create some new dolls for the class......Heather is actually working on a tiny "Prim" doll that will be crackled!  Cant wait to see her completed!

So these are my  2 new Tiny paperclay Fairy dolls for the "occasion"!!!   I think they will be "sweets" dolls inspired by Talented Polymer Clay Artist Amber Dawn!  Amber makes "Amazing" miniatures and charms...lots of beautiful Tiny "sweets" and cupcakes..Yum!  I have taken  polymer caning and sweets classes from Amber, and I will try to apply some of  what she taught me to these dolls.  I'll see what happens!!! haha!

I found some great fabrics that remind me of taffy and chocolate and Caramel....Mmmmm! 

I have included some of the steps we will be going through to create The Tiny Paperclay dolls .  I'm So looking forward to this class!!! These New York girls are Creative and Fun to work with!   Dori, the owner of the Studio, and "Charm Girl"  Amber Dawn will also be Participating ...how cool is that!?   


Sunday, June 6, 2010

A Tiny Doll from Polymer...


Two weeks ago, I Taught a small group the tiny Mixed Media doll in polymer clay  ...I normally do the doll in paperclay,  The girls thought it might be easier for them...so I changed some things around and I really like how the doll body worked out. 


I made the same head /Bodice armature from foil , but I added a complete wire skeleton.  In my paperclay dolls...I would always just build the arms and legs on wire, and push the wires into the stuffed cotton body. They were more "leaners"! Now the doll can do a full pose!   Also, This doll was done with a 2 way stretch fabric that slipped over the wire skeleton, with the arms and legs completed...it was then stuffed......see photos.


I completed my doll and she has a tiny Wish Fairy" with her.  I Embellished the doll with teeny tiny roses out of polymer clay that I covered with Texture Glass Medium...they actually look "encased" in glass"!  I love this stuff!! I learned how to make these teeny little roses from Amber Dawn .  The minute I laid eyes on Amber's teeny tiny roses..I knew I would want to incorporate her technique into a doll...


I actually had a problem with her arms being out of proportion after I put her together...so I cut the baked arms in half, taking some length away...I was able to slip the arms off of the wire and attach  fancy BEAD CAPS , then adding a rose...making a "pretty" JOINT!
  
Her Wings were shaped from wire, I used tissue paper and 2 Part Resin...adding glitter..then I gave it a coat of Texture glass...
Her crown is polymer clay with gems, clay roses and metal findings...tinted with alchohol inks, gel rub ons, and my new favorite Tim Holtz, distressed rock Candy!

Her ballet slippers are velvet and silk ribbons.

Tuesday, June 1, 2010

A Day with Doll Artist Lillian Alberti


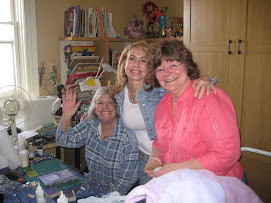
Last week I was able to have my good friend Lillian Alberti,  AKA  "Lilliano" ,  come to my shop to reconnect,  talk "Art" and work on our on going projects. 


 Lillian is working  "Fast and Furious" making paper clay dolls, and Teaching all over the states !    I was so happy when she was able to "Carve out"  a little time to come over and "Play"!!!   


The Day was fantastic, and Lillian ALWAYS  inspires me with her dolls that "Tell a story"  ..they  make the viewer feel certain emotions. Her doll's "Eyes"  and "Fingers" really talk to me ! 


See Lillian's dolls in progress....Her Alice, has a Rabbit jumping into the hole, with his back end and the perfect little velvet jacket sticking out...it really makes you feel like you see him jumping down the hole!  (unfortunately I did not capture that in my picture.) 
..but you can see the doll on her website  www.A-lil-whimsy.com  ! 


 Also visit her blog  cottagehill you can click on her blog from the sidebar on this blog under  "My Absolute Favorites". 

Sunday, May 23, 2010

Making Leopard Canes with Amber Dawn


Well, last week was another "mini" class at the Purple Petals Studio in New York!  Myself, Tery and Heather took the trip into the city to learn more Claying Techniques from Amber Dawn.  Amber was ready to teach us whatever our little hearts desired!!! 


I forgot that I mentioned to her that I would love to learn creating Leopard Print in clay.....As Amber took out her clay and samples of work...Something "UNBELIEVABLE" caught my Eye!  O M G!  TEENY TINY Leopard print made from polymer!!!~  I didnt believe that that was possible...How did she make it look like Leopard...How did she get it so tiny??? The possiblities of using this in my doll making was making my heart race...Crowns, shoes, ...blah blah blah...So she is asking us...so what do you want to do?  and I'm looking at everyone like..."Nah I dont want to do leopard...Right!!!!!!!???   Every one loved it...and they all agreed...We had the best day learning this designing/reducing technique!  I was High when I left there...It felt like I received a very "Cool" Gift!


This is how the Design started...and these tiny pieces are what we ended up with!  We all worked on this print together..Wow!  I love it! 

We all created Beads in class, and Amber gave me the two samples she made....see the picture .  I made the tiny pocketbook charm when I got home after Amber showed us her pocketbook making technique....it is very small...like a Penny!

We will be getting together with Amber Dawn to learn more techniques next month!


Saturday, May 15, 2010

Tiny Polymer Mixed Media Doll Class...More Milo Files!


This Tuesday,  Our  "Secret" group met and created new "Milo files"......I had the pleasure of teaching the group my TINY Fairy Mixed Media dolls, but in Polymer  (most of my tiny dolls are paperclay).    Heather has sculpted, but never this tiny...and Doreen and Sue have never sculpted with polymer., both of them are new to dolls!    Everyone felt that they would do better in polymer.  I agreed that polymer takes detail easier, but PAPERCLAY CAN ALSO BE EASY IF YOU USE LESS DETAIL IN SCULPTING, AND USE MORE "PAINTERLY" DETAIL.   IN THE END, WHICH EVER MEDIUM YOU ARE WORKING IN.. IT IS EASY  AND FUN TO CREATE  A TINY MIXED MEDIA DOLL!!!!!
 These are the two dolls that I am working on with the class.  The larger one was the first doll created..and it literally "Crackled when I baked it.  I had such a hard time with the first batch of clay...after this happened ..I threw out the clay...maybe it was old!? I never ran into this before...so I started on the second one (to the left) and I like her much better, she is tinier and has nicer detail.  Maybe I will try and crackle that first doll as suggested by Heather! hmmm!  maybe she will work out after all! 


The crown was created for the second tinier doll...I 'll try and incorporate the vintage black and white Diamond design into her outfit. This picture doesnt show the correct color of the diamond design...It is worn out black and pearl white!
 I arrived at Sues with some sample dolls as a guide for size, and also a kit for each Person!  The kit contained the conditioned clay .... (I used Prosculpt with  Bisque Cernit mixed in for a soft yet blendable clay.), pre made foil head/bodice armatures, "SKIN" fabric, Prepared Silky Mohair, Eyelashes and Triple thick for glossing the eyes and lips, shoes...

Of course we had a little bit of "Christmas" first!!   Doreen made beautiful beaded bracelets for everyone...gifts of "Crafting items" were flying around  and Sues daughter Carol even stopped by and gave each of us a beautiful handmade Beaded ring!  What  an "INSPIRING" day!


Anyway,  after much Chattering about Techniques and Products  the class really went great!...and in a few hours everyone was able to bake their fairy head and bodice.  I showed them how, after baking...small changes can be made by carefully smoothing on a little clay and rebaking!  I usually use this technique to change the lips ,nose, or an uneven cheek  without it being visible.

Next Week we will create the arms, legs and soft body, and put the doll together.  Woohoo!  cant wait!

There are also some Pictures of the First part of this class, Tiny hats and crowns.  See the picture of everyones completed creations! WOW!


Sunday, May 9, 2010

Make and Take a SUCCESS!! haha!!!

So , Here we are at the Shephard valley Creamery doing the BIG  FREE Make and Take!!!  WOW   LOTTA WORK!!!!  I created the two different sheep for kids to create at the shearing festival on Saturday!  All week long I sewed a hundred tiny felt Sheep bodies, got my supplies together..and made my PLAN!!   
My friend Heather said that she would come and help, ..I was doing this on my own, so I welcomed her.  WELL!!!!  THANK GOD!!!!   All the plannung I did, could never have prepared me for the Day!!!


When we arrived, the creamery offered us a wonderful talented helper, she is a  12 year old "Sprouting" artist..we could not have done it with out her!


 " WOW....tons of kids...every kid that walked by wanted to make the "Tiny Lamb dolls"  Oh, and so did their PARENTS!!!   Once the ball got rolling there was no turning back...Heather was on her game...and she Quickly made new rules!!!   I dont remember even seeing faces or bodies after a while..just tiny hands...with glue and sheep hair flocking stuck to them!!!


All in all it was a fantastic experience and it was a thrill to introduce ART to childeren..

Tuesday, April 27, 2010

Purple Petals...Amber Rose Miniatures...Tweener TECHNIQUES!

Well its been a busy 2 weeks with a lot going on and Nothing getting DONE!!! I guess it was a "TIME OUT" for technique learning!

  Last week I took at class at the PURPLE PETALs STUDIO in Maspeth NY with my friend Heather!  We Took a Minitaure Class with Amber Rose.  Amber is a Minature artist extrordinaire...creating the most beautiful charms from clay and mixed media. We learned a "skinner" blend and how to create beautiful shades of color blending into each other for petals and leaves.  All of the work with clay for dolls...we were the "dummies of the class!!!"...There is a whole "Other" clay world out there!!! So much to explore...not enough time to create it all!!!!   See some of the pictures.....Of course I came up with some vintage Treats and pillows with the tiniest flowers that are my favorite thing that Amber taught me....They will probably adorn my next couple of dolls!!!    The picture of the mixed minies are Ambers beautiful inspirations..... There is a picture of Amber Rose teaching, and also of Dori,  The Fantastic creative Owner of the Purple Petals Studio!


Also happening soon is my "Make and Take GIG" at the shepherd Valley creamery on Saturday may 8th.  I will have a set up there, doing a make and take for kids to make tiny sheep dolls....the picture are my samples of what we will do....The little sheep is sculpted from clay ...cover in sheep hair and painted.  The other is a sewn felt body using the same technique.


And One last thing I did this week, was bought a couple of the Tim Holtz Sizzix dies and created a bird cage charm.  Of course it was too big for me...so I cut it out of Shrinky dink...dyed it with some alcohol inks , stamped it..."vintaged" it up with some metallic rub-on colors AND SHRUNK it...Added some  worn findings...! Of Course, My Bird is OUT of her cage!!!   A "Sagg" is always working on "being FREE!!"   Its pretty cool looking and its "just my size"!!!

NY wow

NY wow
dIANE kEELER CLASS

Diane Keeler Class

Diane Keeler Class
Diane Teaching

Diane Keeler class

Diane Keeler class
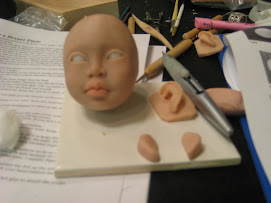
Class Picture

Sculpting a Childs face

Sculpting a Childs face
My face ..Day 2 ..ready for EARS!

Working on a new face now!!!

Working on a new face now!!!
Completed face and breastplate

Attached head to breastplate

Attached head to breastplate
The clay is very dirty..the cleanest i can get it!

After Face Make up

After Face Make up
WOW...it gives a translucent glow...hid the dirt!

Removable wig...not styled or cut yet

Removable wig...not styled or cut yet
Goat mohair that was dyed and combed

Now she's styled!

Now she's styled!
But it is a wig...it will be glued when i'm ready!!!

Painted Face...still needs brows and lashes!

Painted Face...still needs brows and lashes!
She will be sealed with Duncan flat mat as soon as it comes in the mail!

Cloth Pixie body fit under breast plate...

Cloth Pixie body fit under breast plate...
After drawing and sewing a million body parts....

Girly girl "21" charms

Girly girl "21" charms
Angelica's 21st birthday charms

Devon with his creation

Devon with his creation
Devon and his monkey boy

Devons Doll that he made from a pattern

Devons Doll that he made from a pattern
Monkey Boy

another charm group

another charm group
Debbies Charm

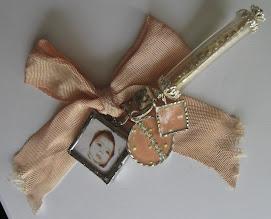
Leapord tube charm

Leapord  tube charm
The diamond shape is a soldered glass bead.

Wax medium melted over polymer clay face....

Wax medium melted over polymer clay face....
She's getting there..i think this hair suits her better..she needs eyelashes and ears

Odd Vintage bug- like Fairy

Odd Vintage bug- like Fairy
Just the idea

Clay Window glazed with Utee

Clay Window glazed with Utee
Stamped Utee glazed "Charms"

Clay Charms

Clay Charms
Making a mold from a charm to make more charms!

Charming

Charming
Clear tubing and stamped Utee

Charming!!! ....REALLY!!!

Charming!!! ....REALLY!!!
Soldered Vintage photos

Charming!!! ....REALLY!!!

Charming!!! ....REALLY!!!
Soldered Charms

Journal Day with Tery and Stephanie

Journal Day with Tery and Stephanie
Creating an Art Journal

Stephanies journal

Stephanies journal
of course..completed first!!

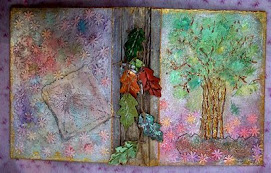
New Art Journal

New Art Journal
Journal made from SCRATCH!!!

Art journal EMBELLISHMENTS

Art journal EMBELLISHMENTS
Clay, Stamps, Utee

Inside cover

Inside cover
Material and free motion stiching

Celeste

Celeste

Celeste up close

Celeste up close
Celestes shirt is made from gessoed and tinted lace with free motion embroidery

EVA

EVA
She is with her new mom Evelyn